Pages

Thursday, April 28, 2011

Sanjeev Kapoor's- Hara Bhara Paneer Tikka

I have immense faith in Sanjeev Kapoor's recipes. He is referred to as "The most celebrated face of Indian cuisine" for a reason right? :). None of the recipes I have tried of his has ever failed me. My only problem is with his TV shows, they show some 3-4 dishes in like half an hour n' that means everything is happening so fast...I'm sometimes worried I'll miss out something. When I saw his show on using a grill stone for cooking, I was sure I have to try this paneer recipe that was featured. The first time I made this dish was about a year back. Have tried this many times after that n' it has always been a winner. But my paneer pieces weren't grilled to perfection, like I wanted it to and could never get a decent photograph until now.


Photobucket

I attended a BBQ session at Weber- Bangalore (outdoor BBQ grill dealers) recently and it helped me a lot with the grilling process this time around, (even though this recipe calls for grilling on the stove top.) Chef Sarabjeet, gave us a lot of pointers and it proved useful to me. They are running a weekend half a day BBQ workshop on May 1st, do let me know if you are interested, will give you the contact details. It is in fact, my favourite Paneer Grill recipe to date. So here you go.


Photobucket

Ingredients:

For the Paste:
1. Fresh coriander leaves : 2 bunches
2. Fresh mint leaves: 1bunch
3. Green chillies: 4nos (reduce if you don't like it too spicy)
4. Garlic: 10cloves
5. Ginger: 1 1/2" piece
6. Lemon Juice: 2tsp
7. Onion: 2nos (medium sized) chopped
8. Salt: as per taste
9. Hung Curd: 1 cup
10. Fresh pomegranate pearls: 2tbsp

For the Marinade:
11. Gram Flour (Besan): 4tbsp
12. Kasoori methi powder:2tbsp ( I used dried kasoori methi leaves)
13. Chat Masala: 2tsp
14. Roasted Cumin Powder: 2tsp
15. Garam Masala: 2tsp
16. Mustard Oil: 2tbsp ( I used regular Sunflower oil)

Other Ingredients:
17. Paneer (Cottage Cheese): 500gms (2 inch cubes)
18. Onion: 2nos (medium) cut into 2 inch pieces
19. Green Capsicum: 2nos- seeded(medium) cut into 2 inch pieces
20. Tomatoes: 2nos- seeded (medium) cut into 2 inch cubes

Method:

Step 1: Grind together green chillies, coriander leaves, mint leaves, garlic, ginger, lemon juice, onion, salt, yogurt and pomegranate pearls into a thick paste using very little water.

Step 2: Roast the cumin seeds n' powder it using a mortar and pestle. Roast gram flour for two to three minutes and set aside.

Step 3: Place the paneer cubes in a bowl, add kasoori methi powder, chaat masala, roasted cumin powder, garam masala powder, roasted gram flour and the ground paste and mix well. Add a tbsp of oil to this and marinate the paneer for two hours.

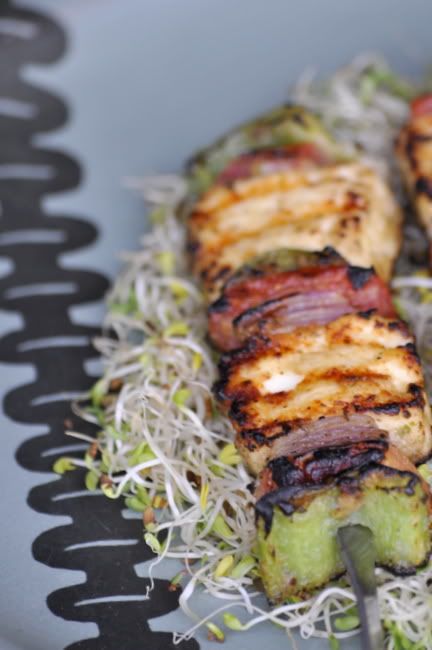
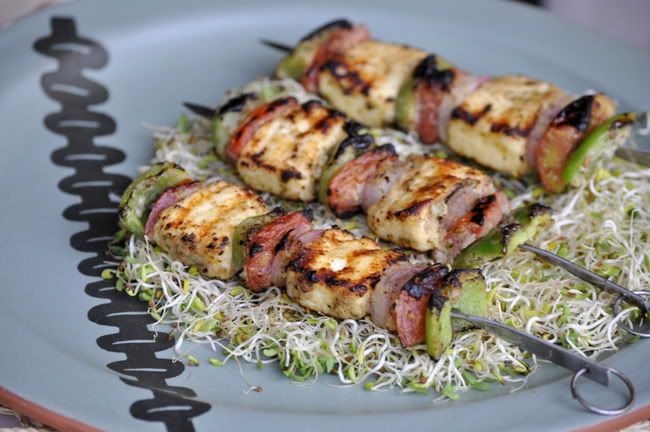
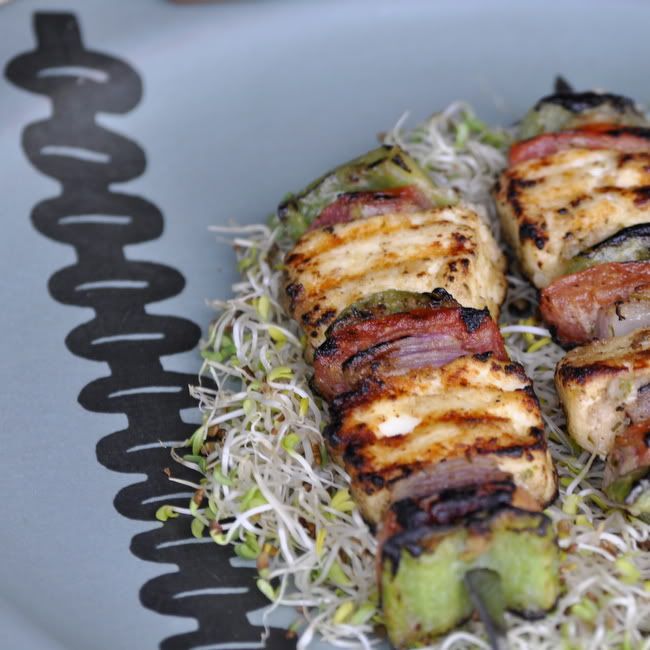
Step 4: Thread the paneer pieces onto skewers alternating with onion, capsicum and tomato pieces.

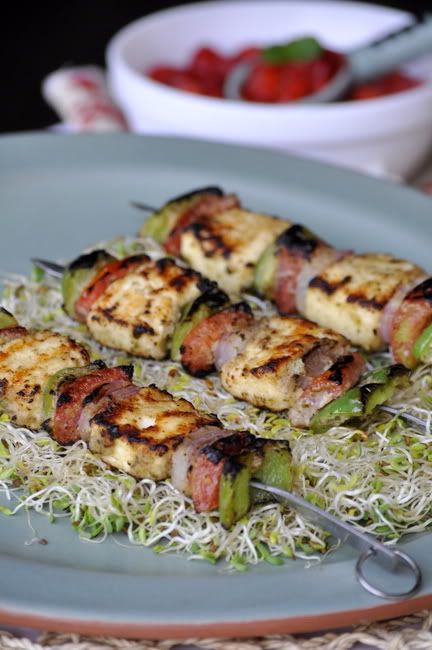
Step 5: Season the grill stone/pan with oil and heat. Place the skewers on the hot grill pan and grill for three to four minutes. Baste with oil, turn the skewers and cook the other side for two to three minutes. Once this was done, I turned the flame to high and grilled it over the flame for 5-6secs both sides. (this step wasn't part of Sanjeev Kapoor's recipe) Serve it hot with a dip/chutney and its gonna impress everyone.


Photobucket

I'm gonna give this recipe★★★★★ ;) Its a must try, take my word for it. Happy Cooking!


Photobucket


I'm sending this post to the event Dish Name Starts with H, hosted by Akila from Akila's Kitchen.

Wednesday, April 27, 2011

Chicken Aioli Salad

I'm in love with Jamie Oliver, I have been since a while now. To me no one is as rustic as he is in the kitchen. I haven't tried very many of his recipes, but he has this knack to make you love simple food. His TV shows, with him, in his kitchen garden nipping n' cutting, fills me with a need to have a kitchen garden of my own. :)

Anyways, let me just stop gushing about him (for the time being) by saying that I have used his Aioli Recipe for this simple chicken summer salad. Aïoli is a lovely fragrant and pungent type of mayonnaise.

Photobucket

The ONLY (n' I mean "only") non veg junk food I love is this Chicken Pop corns on the KFC menu. I don't eat chicken burgers, i don't eat chicken wraps n' I don't eat their speciality Kentucky Fried Chicken. But these pop corns.....I find myself craving for them. Today having spend the whole morning out in the sun, I decided to get one portion of these Chicken Popcorn for myself to snack on while walking to the bus stop. But as I was stepping out of KFC, I saw my bus standing at the traffic signal n' rushed to get on it. I thought I'll eat them once I reach home savouring each piece one at a time. (lol...now do you know how much I love them??) While on the bus I started imagining this Chicken Salad with some crunchy greens and a rich creamy sauce using these chicken popcorn. This salad captures the essence of summer for me. Light, Crunchy n' Creamy. So here you go...

Photobucket


Ingredients:

For Aioli
1. Garlic: ½ a small clove of garlic (peeled)
2. Salt: as per taste*
3. Egg yolk: 1 (large)
4. Dijon mustard: 1 tsp
5. Extra virgin olive oil: 2 tbsp
6. Olive oil: 2tbsp
7. Lemon juice: to taste
8. Black pepper : as per taste (freshly ground)

*The Dijon mustard I bgt was already salty, so I have had to use very little extra salt.

For the Chicken
You can either grill some boneless chicken pieces or use a little spicy batter to deep fry small boneless chicken pieces (either way its gonna taste good)

Other Ingredients
Walnuts: 6-7 nos (chopped)
Strawberry: 2-3 (really ripe ones)
Lettuce Leaves: as required (I used Iceberg Lettuce coz they are so crunchy)
Alfalfa Sprouts: as required

Method:

Step 1: Crush the garlic and some salt in a pestle and mortar.

Step 2: Whisk together the egg yolk and mustard in a bowl

Step 3: Start to add your olive oils bit by bit. Once you’ve blended in a quarter of the oil you can start to add the rest in larger amounts.

Step 4: When it’s all added in and blended well, add the garlic and lemon juice.

To finish it off the sauce, season to taste with salt, pepper and a bit more lemon juice if needed.

Step 5: Add the chopped walnuts to the Aioli. Add the shredded/torn lettuce leaves (tear the leaves with your hands, its better) to this and toss the leaves well with your hands. Into a plate, serve some of the coated leaves, sprinkle some alfalfa sprouts, the chicken pieces and chopped strawberry and its ready.

Photobucket

Thursday, April 21, 2011

Chocolate Carrot & Walnut Cake

Photobucket


The first time I had freshly baked carrot cake with some freshly brewed black coffee....I really experienced heaven! My ex-colleague in Bahrain, Ruby Monkhouse, bakes the best carrot cake I have tasted. Jeff, Marise n' me, we would just wait for Rubz to bring some carrot cake treat for us. Rj on the other hand, who has never had them already declares he wouldn't like them. Rj is a foodie, but a real fussy one. Drive me up the wall most of the time.

Photobucket


I have been craving for some carrot cake since a while, but have been putting it off thinking, I will eat one piece, max to max 2 pieces..then who would eat the rest? That's when I came across the idea of Chocolate Carrot Cakes n' I thought to myself...wow....this exactly what I need. I mean they don't look like carrot cakes at all...:) So I just went ahead n' baked them, we have finished almost half the cake n' Rj is none the wiser as to what the main ingredient is...the only comment he made was..."this chocolate cake is slightly different" n' I said, "yeah, it must be the walnuts!"....lol...(lucky for me he doesn't read my blog....lol) So here you go..

Photobucket


Ingredients:

1. All Purpose Flour: 1 cup
2. Baking Powder: 1 and 1/4tsp
3. Baking Soda: 1/4tsp
4. Salt- 1/4tsp
5. Eggs- 2nos
6. Carrots: 1 and 1/4th cup (grated)
7. Caster Sugar: 1cup (adjust this a little if you don't want it too sweet)
8. Butter: 1/2 a cup* (room temperature)
9. Vanilla Extract: 1 1/2tsp
10. Cocoa Powder: 1/2 a cup
11. Walnuts: (crushed) a handful (add more if you like it)

Method:

Step 1: Heat oven to 180°C or 350°F. Grease a cake tin and line the bottom with a greaseproof paper. ( my Oven becomes hot fast, so as part of saving power, i always do this step just before I mix the dry ingredients with the wet ingredients.)

Step 2: Sift together all the dry ingredients like flour, baking powder, baking soda, salt, caster sugar and cocoa powder.

Step 3: I would grate the carrots only at this stage. (as they will be fresher this way)

Step 4: Whisk the butter until really smooth n' creamy, add the vanilla essence and mix well.

Step 5: Add eggs one at a time and whisk well.

Step 6: Add the sifted dry ingredients in portions and whisk well,fold in the chopped walnuts.

Step 7: Pour out the same into the greased cake tin. Tap the bottom on to your work surface to ensure that there aren't any air bubbles.

Step 8: Bake it in the oven for about 30mins. Check the cake after 30mins, the centre of the cake should feel light n' springy, if you dip a toothpick in the centre it should come out clean. If you feel it is still sticky, bake it for another 5-10mins.

Photobucket


Cool it for 15mins or so and then cool it completely on a wire rack. I really liked it, but I thought it needs an icing, Ruby uses a Cream Cheese frosting with her carrot cake n' its just lovely, I haven't found cream cheese here in Bangalore yet, so couldn't do it. But a light icing would do wonders to this already great cake. Happy Baking!!

Photobucket

Wednesday, April 20, 2011

Mango Ice Lollies- Summer Delight on a Stick

Photobucket

I got the moulds for ice sticks recently thinking I will make something for my nieces when they come for a visit next month....I washed the mould n' left it to dry n' RJ walks in at the end of the day sees them in the kitchen n' he is immediately like..."oh wow, you are gonna make me some ice sticks?"...honestly I just loved the idea...I mean I used to eat them by the dozens when we were kids....I can remember the days when I would stick out my tongue to check the color after having grapes, orange, mango ice sticks (we used to call them ice lollies). I have already done couple of batches so far n' we love them. They are just perfect for the hot summer n' so easy...:)

Photobucket

Ingredients:
Makes about 4 ice lollies

1. Ripe Mangoes: 3nos (Medium Sized)
2. Sugar: as per taste (check to see if needed)

Method:
1. Peel and de-stone the mango.
2. Chop them into small pieces.
3. Blend the mangoes and sugar together.
4. Fill the ice lolly moulds with the puree and freeze. (add a little water only if the puree is too thick)

Kids would just love this homemade treat....why kids? like us, you might enjoy them too...:)

Photobucket

I'm sending this post to 'Healing Food- Mango' event hosted by Reva of Kaarasaaram this month, also linking Siri of Cooking with Siri .


Also, sending this post to the event 'Kids Delight' hosted this month by Mina of Authentic Vegetarian Recipes, this event was initiated by Srivalli of Spice your Life.

Tuesday, April 19, 2011

Aloo Parathas- Coined by Me

I wanted to call this post...'Coin Aloo de Parantha'...but RJ says that sounds all wrong (especially coming from a mallu gal) ;)...but i liked the ring it had...:). I think any mallu worth their salt knows about 'Kerala Coin Parotta'. I really enjoy them, but I have wondered on why they are called that...they are small but definitely bigger than a coin....so why are they called 'coin parotta'? Anyone who knows the answer please let me know.

I have made Aloo Parathas only couple of times before n' they weren't all that great...I have tried different recipes but I didn't get them right. But i'm glad to say all that is ancient history. If you have had a similar experience, well try this recipe here n' you'll be thrilled with the results. I'm in love with this recipe. ;) (well...what can I say i'm almost always overjoyed by simple pleasures in life!)

Photobucket

My blogger friend Madhuri from Cook Curry Nook posted this recipe for Cabbage Parantha couple of days back n' again I had this desire to try it out. RJ as it is gets a little worried when I tell him I'm making an attempt at aloo parathas (you know the history!), so didn't want to scare him with more veggie options. I know Mads is a great cook, so I followed her instructions n techniques to the t, other than changing the main ingredient n changing a few measurements here n' there. It was a huge hit n' we both loved it. Couldn't take any snaps last night though.

But I had some leftover filling and made them again for lunch today, just for me. ;)
And to add a little masti, I made them small like Coin Parathas today. ;) The idea to make them small came to me when the last atta ball turned out to be really small. So here you go. You can make 10 regular sized parathas using this recipe.

Aloo Paratha

Ingredients:

For the Dough:
1.Whole wheat flour – 3 cups (plus extra for dusting)
2.Salt – to taste
3.Water – as required
4.Oil – 1 tbsps

For the Stuffing:
1.Potato – 3 nos (medium-sized, boiled with salt, peeled and mashed)
2.Garlic – 2 to 3 pods (finely chopped)
3.Ginger – 1/2″ long piece (crushed/minced)
4.Coriander/Cilantro – 2tbsp (finely chopped)
5.Green Chili (optional) – 1 no (finely chopped)
6.Chili powder – 1 tsp
7.Garam Masala – 1 tsp
8.Cumin Powder – 1 tsp
9.Coriander Powder – 1/4 tsp
10.Amchur Powder/ Dry Mango Powder (optional) – 1/2 tsp
11.Salt – to taste

Method:

Step 1: Prepare a dough as you would for chapathis. Cover and set aside for atleast 15-20 minutes.

Step 2: In the meantime mix together all the ingredients for stuffing (except salt) and set aside. (Madhuri gives a tip here asking us to add the salt only at the end as you are about to roll out the parathas as it will make the studffing soggy otherwise). If you have already used salt to boil the potatoes, just be careful while adding more.

Step 3: This is best served hot so once you are ready to begin, take a small amount of the roti dough, dust with some flour and flatten with a rolling-pin. Dip your finger in oil (keep aside a small bowl of oil just for this) and spread it onto the side where you are gonna keep the filling. (this is not part of the recipe from Madhuri) Also, if you want to make coin parathas make dough ball really small or you can do the needful in step 5)

Step 4: Put a nice heaped tbsp of stuffing in the centre and draw the edges of the dough towards the centre to cover the mixture.

Step 5: Dust with more flour, and roll out to a thickness that you want for your parathas. (Madhuri says Too thick a parantha will not cook well and too thin will break/crumble easily.) If you want to make coin parathas, cut it into small round circles using a cookie cutter, I had done this only after making the parathas. But if you do it at this stage, you won't waste any dough.

Step 6: Heat a tawa and cook the parantha on a medium flame. Remembering that this takes longer to cook than chapathis.

Step 7: Increase the flame at this stage and use butter or oil to cook the parantha on both sides. Lightly press it on to the tawa on each side to cook and get a nice crispy texture on top.

Masala Curd

Another good thing about this dish is it doesn't need a curry to be served along with this. You can serve it with some nice yogurt/curd and pickle. I whipped the curd to make it smooth and added a little salt and a little cumin powder to get the right flavour.

I'm leaving the amount of oil/butter to be used for this recipe upto you, Can't share how much I used n' but it did taste really good. :) Compared to the phulkas I make everyday this was definitely sinful. So as a sinful indulgence once in a while it is fine, but not as an everyday meal.

The below snap is of the flowers that can be found all over Bangalore now. It is from a tree close to my place. Bangalore in bloom is just so so pretty.

Photobucket

Sunday, April 17, 2011

Corn Pepper Lime

As I'm sitting down to type this post, I see I have mail from Arundhuti of My Saffron Kitchen, I quickly click on the mail and see that I have won my first ever giveaway prize and that too a cookbook called "Cakes and Bakes" by Sanjeev Kapoor. I'm thrilled to bits and I'm thanking Arundhuti from the bottom of my heart. I mean, I really need to improve my baking n now I feel like God and Arundhuti (along with Sanjeev Kapoor) is gonna help me achieve this mission. :) She mentions that she will be doing more giveaways, please do visit her blog for more details.

Photobucket

Coming back to this post,I saw some really fresh corn in the veggie shop today and decided to buy it, without having a clue as to what I want to make with it. I'm into finding out the benefits of my ingredients now. I mean if I can, I would love to eat healthy food and Corn I read is a good source of Zinc. But having boiled corn for this recipe, I wonder if the nutrients were retained. Anyway,I have had this flavoured corn in a cup at least a zillion times when we go out (mostly found in Malls). I used to have them even when we were in Bahrain. My favourite flavour is Lime and Pepper. So for a lazy Sunday evening, I decided to try making this as evening snacks. It turned out easy, healthy and tasty. Its really simple..

Photobucket


Ingredients:

1. Corn Pods/Seeds: of 1 medium sized cob
2. Butter: 2tsp
3. Lemon Juice: half a lime (or as per taste, i love it sour)
4. Pepper Powder: 1/2tsp 5. Salt: as per taste
6. Water

Method:

Step 1: Boil the corn pods/seeds in water. Add some salt to the water while boiling. Roughly 10-15mins. (The pods should almost double up in size and should become really soft.). Set aside and corn in a deep bowl. Retain a little of this water separately to use later.

Step 2: Melt the butter. Add the lemon juice to this and mix well. Add couple of spoons of the salted water used to boil the corn to this. (If you are using salted butter, just remember to keep checking the seasoning)

Step 3: Add pepper powder to the bowl of boiled corn, add the lemon juice mixture and whisk well to get the corn coated well, and this is ready to serve hot. :)

When we buy this, I'm always trying to lick off even the last drop of liquid in my cup. So when I made this at home, I decided to give myself some extra juice.:) In the theatre we spent nearly Rs.50/- for this much corn last week, having made this at home I don't think I have spent more than Rs.20/- on this. ;). Between,if you are wondering the reason why I'm garnishing every post these days with Mint, its coz I have a nice mint plant in my small terrace garden now. ;)

You can replace pepper with the other flavours like chili flakes, chat masala etc. Add some chopped tomatoes and you can serve this as a Salad. I'm sending this off to the event Souper (Soup, Salad & Sammies) Sundays hosted by Deb from Kahakai Kitchen.


Photobucket


Friday, April 15, 2011

Soya Chunks Ularthiyathu


I have never cooked with Soya Chunks, no that's not true....I should rephrase n' say I have never successfully cooked with Soya Chunks before today. The first time, I heard about this ingredient itself was around 5yrs back. RJ asked me if I knew how to make anything with Soya Chunks n I was like..."what are Soyachunks?" (really I had no clue). I told him I have never had this back home. Since I was a newbie cook with a lot of enthusiasm n' zero skills back then, I told him I'll make him something with soya chunks. Lets just say it was nightmarish. I had never bought soya chunks after that.

I'm observing lent this year and have been trying to make some new (n' possibly interesting) veggie dishes for RJ, who is, please note not observing lent. :( This is not really easy. Then my cousin, who turned veggie a couple of years back told me about this interesting Soya Chunk Ularthiyathu which is like this perfect substitute for Beef Ularthiyathu for vegetarians. I told her the bad experience I had with soya chunks n she said...."onnu podi, it's really easy, try it!" (can't translate the words "onnu podi" into English n' capture its essence) :)

Then I saw the 2 blog posts with soya chunks on Priya's Blog- Priya's Easy n Tasty Recipes and got really inspired to try it. So here you go...

Ingredients:

1. Soya Chunks – 1cup( cook as per instructions given on the box or cover)
2. Onion- 1 no (big- sliced)
3. Green Chili- 1no (slit) avoid this if you don't want it to be spicy)
4. Homemade Garam Masala- 1tsp ('amma special' from home)
5. Chili powder – 1/2 tsp
6. Coriander powder – 1tbsp
7. Turmeric powder – 1/2 tsp
8. Ginger – 1/2inch piece (crushed)
9. Garlic – 1-2 pods (crushed)
10. Small Onion– 10nos (crushed)
11. Salt – as per taste
12. Vinegar – 1 tsp
13. Mustard seeds – 1 tsp
14. Curry leaves
15. Oil – 2tsp (let's try n' keep this healthy)

Method:

Step 1: Combine the powdered spices- Chili Powder, Coriander Powder, Turmeric Powder, Garam Masala, crushed garlic, ginger, small onion and salt to the cooked soyachunks. Set it aside at least for 10-15mins for the pieces to get marinated well with the spices.

Step 2: Heat oil in a pan, add mustard seeds and curry leaves. Saute the onions and green chili (if using), till it becomes golden brown.

Step 3: Add the marinated soya chunks and cook it covered for at least 10-15mins. (If needed add a little water at this stage.)

Step 4: Stir fry this uncovered on low flame and stirring occasionally till you get a dark color and it is roasted well. If you want you can sprinkle a pinch of garam masala just before taking it off the fire.

This is best served with rice or chapati and some mild gravy dish. Once I made this I realized, this dish is just so much like Beef Ularthiyathu. To those who have never tried Soyachunks, I won't lie and say this is as perfect as BEEF. For me Beef is like the king among meats. It does look so much like beef and but this is definitely more healthy. ;)

Photobucket


Another thing I wanted to let you all know is, Karen, a contributor to a Wiki project called MyCityCuisine.org contacted me a couple of days back asking me if I would consider posting an announcement that MyCityCuisine is currently looking for contributors. I told her well ofcourse! ;)...So fellow food bloggers who are interested, please go to this website.

Thursday, April 14, 2011

a beckoning- Lime Mint Cooler


While in Bahrain, we used to frequent this South Indian restaurant by the name of 'Sangeetha', almost every Saturday after mass for breakfast. (Yes, since Sundays were working days we used to go for Mass on Saturdays). This Restaurant was right outside the Indian Club and used to be really busy. Irrespective of what we order to eat, we'd invariably end up asking them for a 'Lime Mint Cooler'. Just the name is so refreshing. Now that we are back in Bangalore and summer being particularly hot, I thought i'd surprise my RJ with this family favourite drink's homemade version today....:)

Ingredients:
(Serves 2)

1. Mint/Pudina leaves - 1 handful
2. Lemon - 1 (whole)
3. Sugar- 1 tbsp(as per taste)
4. Water - 2 cups (pfrbly Cold)
5. Ice - 2-4cubes
6. Yellow/Green food color - a pinch (optional)

Method:

Step 1.Extract the juice from the lemons and keep it aside.

Step 2.Grind mint leaves with little water in a mixer until nicely grinded. Then add remaining water,lime juice,sugar and blend it for a minute.

Step 3.Filter it, then mix food color,add crushed ice and serve chilled.

Wednesday, April 13, 2011

Marble Cake


If you look into my blog you can see that i'm a novice at baking. That being said i'm thrilled to bits today coz I baked my first marble cake without using a ready mix....yipppeeee....i'm just so happy....Even though I prefer savoury things to sweet things, I do love a good Marble Cake. My appa used to buy me a marble cake from Anns Bakery ( a famous chain of Bakery from my part of Kerala) as I leave home to come to Bangalore. Honestly, I used to loathe sharing it with anyone. But RJ likes it even more than me, I think. He is cake-aholic of sorts.

These days, I sorta ask him everyday morning..."what would you like to try today?" (makes it sounds very 'oh I can make anything n' everything you want types')...but in reality, i'm really scared of making things I have no clue about. He asked me for a Marble Cake yesterday n' lets just say I didn't make it..But anyways today morning, I decided to give it a go. Feels like I have accomplished something huge....:D...i'm so glad I like my Marble Cake too...i'm just dying for RJ to come home n' get a taste of this....;). So here we go.

Photobucket


Ingredients

1. Butter: 225g (softened)
2. Caster Sugar: 225g
3. Eggs: 4nos
4. Flour : 225g
5. Baking Powder: 1tsp
6. Baking Soda: 1/4tsp
7. Salt: a pinch
8. Milk: 3 tbsp
9. Vanilla extract: 1 tsp
10. Cocoa Powder: 3 tbsp

Method

Step 1: Heat oven to 180°C or 350°F. Grease a 20cm cake tin and line the bottom with a circle of greaseproof paper. ( my Oven becomes hot fast, so as part of saving power, i always do this step just before I mix the dry ingredients with the wet ingredients.)

Step 2: Sift together, the flour, baking poweder, baking soda n' salt. (try n' sift it atleast twice to be sure that baking powder n' soda mixes well or alternativly just use 225 self raising flour)

Step 3: Beat the butter and sugar together, then add the eggs, one at a time, mixing well after each addition.

Step 4: Fold through the flour, milk and vanilla extract into the above until the mixture is smooth. ( I got a little worried at this point, coz the mixture seemed much more thicker n' fluffier than my BC cake mix that I'm used to. But I just blindly trusted the recipe n' went ahead)

Step 5: Divide the mixture between 2 bowls. Stir the cocoa powder into the mixture in one of the bowls. Take 2 spoons and use them to dollop the chocolate and vanilla cake mixes into the tin alternately. ( The only thing I will do differently the next time is reduce the quantity of the mixture which i'm using to mix the cocoa powder that way I think I will get more defined portions once the cake is baked.)

Step 6: When all the mixture has been used up, tap the bottom on your work surface to ensure that there aren't any air bubbles. Take a skewer and swirl it around the mixture in the tin a few times to create a marbled effect.

Step 7: Bake the cake for 45-50 mins or until a skewer inserted into the centre comes out clean. Turn out onto a cooling rack and leave to cool.

This recipe is a keeper. I'm gonna give it ★★★★★ ;)

Photobucket

Friday, April 8, 2011

Chocolate Mud Cake (Eggless)

This is my first post this year, infact its more like my first post since almost a year. Too many things have happened since we moved back to bangalore n' I have not been able to keep up with the bloggers here at all. But my work timing after I started working in Bangalore, left me with very little spare time. Now I have left my job, having decided to take a career break of sorts.

Have been meaning to get back to blogging since a month now, but just couldn't find that start. Today is my Ammachi's (granny's) b'day. She would have been a 100yrs old if she were here with us. She passed away 10yrs back. We were very close and I miss her on some days more than other days. She was an amazing n passionate cook. She was blind but that never stopped her from cooking. I rememeber how I used to sit by her side waiting for her to give me the cake mix bowl once she pours out the mix into the baking tin. Licking the mixing bowl clean esp if its a chocolate cake was an amazing experience. Infact she would leave some extra for me to polish off just coz I loved the dripping chocolate mix so much. But I never spent anytime with her learning to cook. I was interested only in eating what she made, I regret that now. I wish i had learnt from her, would've made me a better cook. So here I am, trying to get better at cooking and dedicating a post to her.

Photobucket


This recipe is called 'Magic Chocolate Mud Pudding' can't remember who I got this from. Yeah 'pudding' but for me the final result is more like a cake. I tried this recipe last week n' it wasn't great. I was amazed my instincts had turned faulty, coz I had fallen in love with the recipe and it didn't taste as awesome as I thought it would. So for the first time I decided to give it a try again. (I mean I never retry recipes which don't turn out well the first time around.) But I made a few changes and now it tastes really nice. I'm dying for RJ to come home n' taste it.

Ingredients:

1. Butter: 50gms or 1/4 cup
2. Muscovado Sugar (light): 200gms or 1 cup (generous)
3. Caster Sugar: 1tsp
4. Milk: 475ml or 2cups
5. Self- Raising Flour: 90gms or 1cup (pls refer to comments if you have only plain flour)**
6. Vanilla Essence: 1tsp (the original recipe asked for 1 tsp of ground cinnamon)
7. Cocoa Powder: 5tbsp
8. Vanilla Ice Cream to serve it with

** Mix 1 and 1/4tsp baking powder and a pinch of salt to flour if you don't have self raising flour with you.

Method

1. Pre heat the oven to 180°C or 350°F. Lightly grease an ovenproof dish and place a baking sheet inside. (since my oven heats up pretty quickly i did this step just before I mixed the dry ingredients to the wet ingredients.) It is mentioned that something like a soufflé dish is perfect for this.

2. Portion or Divide the Brown Sugar, Milk and Cocoa Powder as mentioned below.

First Portion
Brown Sugar: 115gm or 3/4cup
Milk : 150ml or 2/3 cup
Cocoa Pwdr : 1 tbsp

Second Portion
Brown Sugar: 85gms or 1/4cup
Milk : 325ml or 1+1/3rd cup
Cocoa Pwdr : 4tbsp

3. Place the butter in a saucepan. Add 115gm or 3/4cup of sugar and 150ml or 2/3rd cup of the milk and the caster sugar. Heat gently, stirring occasionally, until the butter has melted and all the sugar has dissolved. Remove from the heat. Add vanilla essence to this if you are using it instead of cinnamon.

4. Sift the flour, cinnamon (if you are using ground cinnamon instead of vanilla essence) and 1tbsp of cocoa into the pan and stir into the mixture, mixing evenly. (i used a hand mixer this time on low speed). Pour the mixture into the prepared dish and level the surface.

5. Sift the remaining sugar and cocoa poder into a bowl, mix well, then sprinkle evenly over the pudding mixture in the dish. Pour the remaining milk over the mixture.

6. The recipe asked for 45-50mins (but i thought this was too much) so i think you need only abt 30-40mins depending on the quantity you are using and the dish size. In any case, check after 30mins to see. The sponge should have risen to the top and it should be firm to touch.

Photobucket


This is best served hot with some ice cream. Because it hadn't turned out well the last time, I reduced the quantity by half this time, but now i wish i hadn't. :) In my picture, it looks really different from a pudding or a cake coz it looks so thin. I didn't have a small dish to bake my small qunatity in, had to use the big baking tin itself. Will try n' post a pudding pic when I serve this to RJ with some icecream on top. Happy Cooking!
Related Posts with Thumbnails