Pages

Showing posts with label FoodGawker. Show all posts

Thursday, April 21, 2011

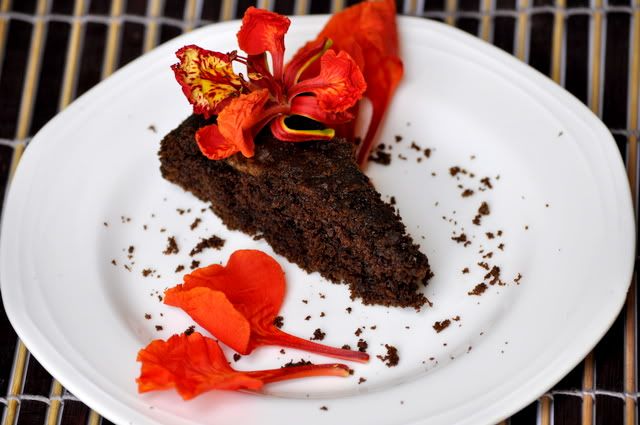
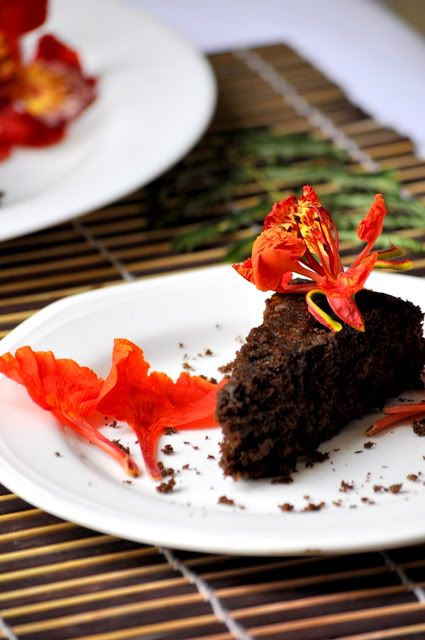
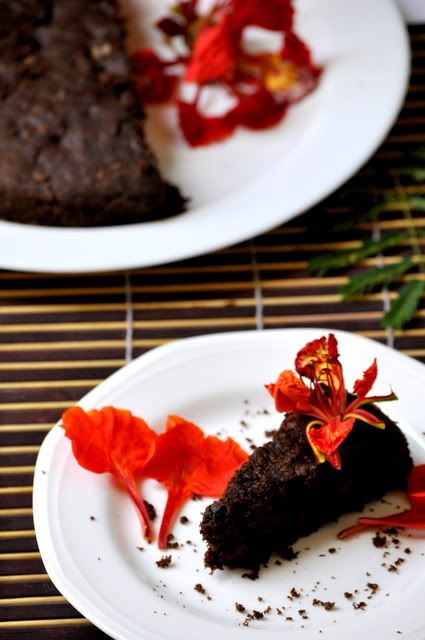
Chocolate Carrot & Walnut Cake

Photobucket


The first time I had freshly baked carrot cake with some freshly brewed black coffee....I really experienced heaven! My ex-colleague in Bahrain, Ruby Monkhouse, bakes the best carrot cake I have tasted. Jeff, Marise n' me, we would just wait for Rubz to bring some carrot cake treat for us. Rj on the other hand, who has never had them already declares he wouldn't like them. Rj is a foodie, but a real fussy one. Drive me up the wall most of the time.
Photobucket


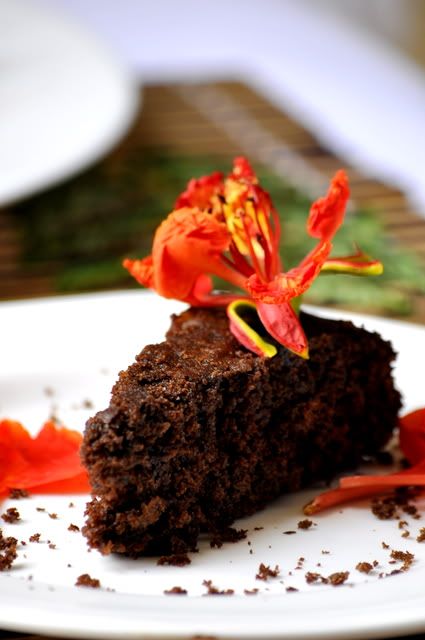
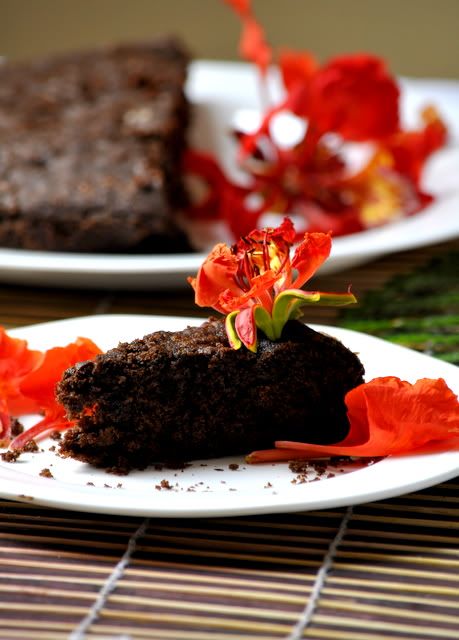
I have been craving for some carrot cake since a while, but have been putting it off thinking, I will eat one piece, max to max 2 pieces..then who would eat the rest? That's when I came across the idea of Chocolate Carrot Cakes n' I thought to myself...wow....this exactly what I need. I mean they don't look like carrot cakes at all...:) So I just went ahead n' baked them, we have finished almost half the cake n' Rj is none the wiser as to what the main ingredient is...the only comment he made was..."this chocolate cake is slightly different" n' I said, "yeah, it must be the walnuts!"....lol...(lucky for me he doesn't read my blog....lol) So here you go..
Photobucket


Ingredients:

1. All Purpose Flour: 1 cup
2. Baking Powder: 1 and 1/4tsp
3. Baking Soda: 1/4tsp
4. Salt- 1/4tsp
5. Eggs- 2nos
6. Carrots: 1 and 1/4th cup (grated)
7. Caster Sugar: 1cup (adjust this a little if you don't want it too sweet)
8. Butter: 1/2 a cup* (room temperature)
9. Vanilla Extract: 1 1/2tsp
10. Cocoa Powder: 1/2 a cup
11. Walnuts: (crushed) a handful (add more if you like it)

Method:

Step 1: Heat oven to 180°C or 350°F. Grease a cake tin and line the bottom with a greaseproof paper. ( my Oven becomes hot fast, so as part of saving power, i always do this step just before I mix the dry ingredients with the wet ingredients.)

Step 2: Sift together all the dry ingredients like flour, baking powder, baking soda, salt, caster sugar and cocoa powder.

Step 3: I would grate the carrots only at this stage. (as they will be fresher this way)

Step 4: Whisk the butter until really smooth n' creamy, add the vanilla essence and mix well.

Step 5: Add eggs one at a time and whisk well.

Step 6: Add the sifted dry ingredients in portions and whisk well,fold in the chopped walnuts.

Step 7: Pour out the same into the greased cake tin. Tap the bottom on to your work surface to ensure that there aren't any air bubbles.

Step 8: Bake it in the oven for about 30mins. Check the cake after 30mins, the centre of the cake should feel light n' springy, if you dip a toothpick in the centre it should come out clean. If you feel it is still sticky, bake it for another 5-10mins.
Photobucket


Cool it for 15mins or so and then cool it completely on a wire rack. I really liked it, but I thought it needs an icing, Ruby uses a Cream Cheese frosting with her carrot cake n' its just lovely, I haven't found cream cheese here in Bangalore yet, so couldn't do it. But a light icing would do wonders to this already great cake. Happy Baking!!
Photobucket

Sunday, April 17, 2011

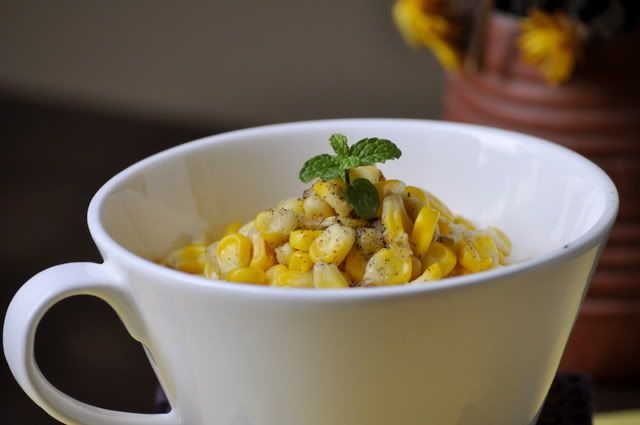
Corn Pepper Lime

As I'm sitting down to type this post, I see I have mail from Arundhuti of My Saffron Kitchen, I quickly click on the mail and see that I have won my first ever giveaway prize and that too a cookbook called "Cakes and Bakes" by Sanjeev Kapoor. I'm thrilled to bits and I'm thanking Arundhuti from the bottom of my heart. I mean, I really need to improve my baking n now I feel like God and Arundhuti (along with Sanjeev Kapoor) is gonna help me achieve this mission. :) She mentions that she will be doing more giveaways, please do visit her blog for more details.

Photobucket

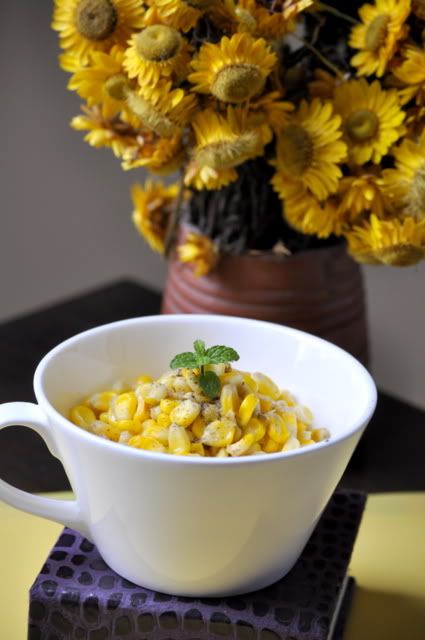
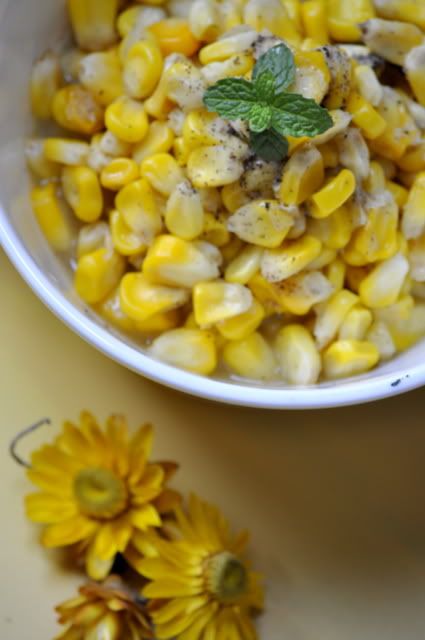
Coming back to this post,I saw some really fresh corn in the veggie shop today and decided to buy it, without having a clue as to what I want to make with it. I'm into finding out the benefits of my ingredients now. I mean if I can, I would love to eat healthy food and Corn I read is a good source of Zinc. But having boiled corn for this recipe, I wonder if the nutrients were retained. Anyway,I have had this flavoured corn in a cup at least a zillion times when we go out (mostly found in Malls). I used to have them even when we were in Bahrain. My favourite flavour is Lime and Pepper. So for a lazy Sunday evening, I decided to try making this as evening snacks. It turned out easy, healthy and tasty. Its really simple..

Photobucket


Ingredients:

1. Corn Pods/Seeds: of 1 medium sized cob
2. Butter: 2tsp
3. Lemon Juice: half a lime (or as per taste, i love it sour)
4. Pepper Powder: 1/2tsp 5. Salt: as per taste
6. Water

Method:

Step 1: Boil the corn pods/seeds in water. Add some salt to the water while boiling. Roughly 10-15mins. (The pods should almost double up in size and should become really soft.). Set aside and corn in a deep bowl. Retain a little of this water separately to use later.

Step 2: Melt the butter. Add the lemon juice to this and mix well. Add couple of spoons of the salted water used to boil the corn to this. (If you are using salted butter, just remember to keep checking the seasoning)

Step 3: Add pepper powder to the bowl of boiled corn, add the lemon juice mixture and whisk well to get the corn coated well, and this is ready to serve hot. :)

When we buy this, I'm always trying to lick off even the last drop of liquid in my cup. So when I made this at home, I decided to give myself some extra juice.:) In the theatre we spent nearly Rs.50/- for this much corn last week, having made this at home I don't think I have spent more than Rs.20/- on this. ;). Between,if you are wondering the reason why I'm garnishing every post these days with Mint, its coz I have a nice mint plant in my small terrace garden now. ;)

You can replace pepper with the other flavours like chili flakes, chat masala etc. Add some chopped tomatoes and you can serve this as a Salad. I'm sending this off to the event Souper (Soup, Salad & Sammies) Sundays hosted by Deb from Kahakai Kitchen.


Photobucket


Tuesday, April 20, 2010

Chopped Egg And Avocado Sandwich


My "Cooking for One" challenge is still on and i woke up really early today...spoke to my sister n' she wanted my Punjabi Paneer Makhani recipe n' i had to sent to her on email....so once that was done i still had time to get ready for work n' decided to make something that feels really fresh...I have 6 posts in my draft that i made which i haven't posted yet...just no time!!!! Month ends are a busy time at work. But this was so good...i just couldn't wait to post it....

Also, i really need to dedicate a post to two of my good friends, Veerendra Mishra and Preetha P (non-bloggers)who found it really hard to believe that i can cook... actually quote unquote..."cook, style n' take decent pics"....lol...sometimes even i'm still surprised...;)...so i'm dedicating this post to them ;)...also i have made an Avocado Milkshake along with this post...i remember when i was working with them in ABN AMRO Bank- Bangalore, i used to order this so often...i can't seem to remember the name of the chain of fruit juice shops we used to order it from..:(...anyways i'm told it's full of good cholesterol....

I'm a big fan of Avocado or Butter Fruit (as we fondly call it back home), when my friend introduced me to Guacamole for the first time....i got addicted to it for life....so when i came across this recipe i was 'Oh so keen' about trying it...so here you go...(pls note i'm going to give the measurements enough to make just one sandwich...please adjust accordingly if you want to make more....)

Ingredients:

1. Egg: 1 large (hard-boiled, peeled and chopped)
2. Onion: 2-3 tsps (chopped)
3. Parsley Leaves: 1 tbsp (chopped)
4. Dry Oregano: 1/4 tsp
5. Dijon Mustard: 1/4 tsp
6. Chili Mayonnaise *: 1-2tsp (yeah i went a little overboard with it...;) )
7. Ripe Avocado: half piece (the avocado needs to be halved, seeded, meat scooped out and diced)
8. Salt: to taste (just keep in mind that the Mayonnaise & Dijon Mustard will already have salt in it)
9. Black pepper: to taste (freshly ground)
10.Brown Bread: 2 slices (i have used a brown bun here but you can use any bread of your choice, lightly toasted)
11. Cheese of your choice: 1no (optional) (i didn't use it)

* i used chili mayo coz i love the flavour, you can use plain. but if you do want to use it and you only have plain mayo with you, all you need to do for a quick fix is just add chili flakes to your mayo n' mix well.

Method:

Step 1: In a bowl, mix the chopped Egg, Onion, Parsley, Dijon Mustard and Mayonnaise together.

Step 2: Toss in the chopped avocado, sprinkle with oregano, salt and pepper and gently mix well.

Step 3: Lightly toast the bread slices. Scoop a generous amount of the chopped egg and avocado on a slice of bread, add a slice of cheese (if using) and top with another slice of bread.

Here's a snap of my Avocado Milk Shake, i had the other half of Avocado which i didn't use in the sandwich right? i made the milk shake with it...as you can see it's served in a Big Beer Glass...i was missing RJ n' decided to have the milk shake in his Beer Glass (a gift from me)...and as you can see it was a lot...so i could have only this for breakfast and i got the sandwiches with me for lunch...;)

Sunday, April 11, 2010

Murgh Makhani urf Butter Chicken

Butter chicken or Murgh Makhani is an Indian dish from Punjab, they say this dish is among the best known Indian foods all over the world. The origins of butter chicken can be traced back to Delhi, during the period of Mughal Empire. While the dish's general recipe is well known, the actual flavor can vary from restaurant to restaurant even within India. Its gravy can be made as hot or mild as you like so it suits most palates. Butter chicken is usually served with naan, roti, parathas or steamed rice.

The recipe i have used here is again from Camellia Panjabi's 50 Great Curries of India. This dish is really creamy and so tasty. What really surprised me was how rich this curry is, i have loved having Butter Chicken in restaurants but only when i got down to preparing it did i realise how rich it is...hence i'm against the idea of making this an every week chicken dish at home....So i'm bookmarking this recipe for guests.;)

Ingredients:

1. Chicken : 900g (use small pieces on the bone or boneless pieces)
2. Oil: 4-5 tbsp

For the marinade:

1. Yoghurt: 2 cups (full-fat or a carton of plain yoghurt)
2. Garlic Cloves: 6nos
3. Fresh Ginger: ½” piece
4. Red Chili Powder/ Paprika: 3/4 tsp
5. Coriander Powder: ¼ tsp
6. Cumin Powder: ½ tsp
7. Garam Masala Powder:
8. Salt: ½ tsp
9. Lime Juice:

For the makhani sauce:

1. Tomatoes: 700g
2. Kasuri Methi (dried fenugreek leaves): ½ tsp
3. Chilled Butter: 75g
4. Paprika: ½ tsp
5. Vinegar: few drops
6. Garam Masala Powder: ¼ tsp
7. Salt
8. Single Cream: 40g

Method:

First prepare the marinade

Step 1: Place the yoghurt in a piece of muslin and leave to hang to allow the whey to drip away ( I have read this is how you make “hung curd” but I didn’t do this as I thought the yogurt I’m using is thick enough).

Step 2: Purée the garlic and ginger in a blender (I just crushed them into a coarse paste using a good mortar and pestle) Add this and the marinade spices, salt and lime juice to the yoghurt and mix well.

Step 3: Make gashes in the chicken if using pieces on the bone. Marinate the chicken in the yoghurt mixture for at least 1 hour, preferably 2; for best results leave overnight.

Once this is done and you are ready to cook

Step 1: Heat the oil in a large, thick-bottomed skillet and put in the chicken with the marinade. Cover and cook over a low heat until done. Turn the chicken over during cooking.

Step 2: While the above is going on scald the tomatoes for the makhani sauce and peel off the skin. Reduce to a semi-pulp with a fork or potato masher.

Step 3: Put the tomato pulp into a frying pan and cook for 5 minutes or so until the liquid has evaporated slightly.

Step 4: Add the chilled butter and paprika; after the butter has melted, let it cook for just 1 minute. Taste… if it has no sourness; add a few drops of vinegar.

Step 5: Add the kasuri methi and garam masala powder and salt to taste.

Step 6: After 30 seconds, add the cream and stir. The sauce is now ready. Add in the chicken pieces and mix well. Serve immediately.

p.s. my snap for this dish has also gotten accepted on foodgawker....yeah yeah yippee yippee....;)

Sunday, March 28, 2010

Phirni


I have never been a big fan of Phirni...but RJ just loves it. On the first night in Bhopal during this vacation, we had gone to Jahan Numa Palace in the night to have some treats from their cafe....this is one place i have to go every time we go to Bhopal. We ordered for Phirni as our dessert n' it was the best i have ever had. You know how it is served in matkas (earthen jugs/pots), it's just so Indian...n' when i came across this recipe last week i just had to give it a try. But i didn't have any matkas with me n' had to use my ramekins instead. The ingredients are a little more complex than i normally use, but i preferred this recipe to the condensed milk recipes available online.

Ingredients

1. Milk: 500ml
2. Rice: 1/2 cup
3. Khoya: 1/2cup
4. Sugar: 1 1/2cup
5. Milk: 1 ltr
6. Almond: 1/2cup (crushed)
7. Cardamom Powder: 1/2tsp
8. Kewra: few drops

Method

Step 1: Soak rice in 500ml milk

Step 2: Boil milk adding sugar.

Step 3: Grind the soaked rice and milk (rough grind not in a paste form)

Step 4: Once the milk is boiled, ground rice n' milk mixture to this n' let it cook for a while.

Step 5: Before it thickens too much, add khoya and cardamom powder into this and let it cook for a while. (thicken it)

Step 6: Add chopped almonds and kewra essence.

Step 7: Serve it directly into matkas or into individual serving bowls & refrigerate before serving.

Getting the correct consistency is important. I think i should have thickened it a little more than what you can see here. But the taste was rewarding, so i was happy.

This is my first photo that has gotten accepted on a food porn website..FoodGawker, look here . I'm thrilled to say the least. Thank you FG...;D

Finally...this image is accepted at TasteSpotting too....Oh Bliss!!!
Related Posts with Thumbnails