Pages

Showing posts with label Chicken. Show all posts

Saturday, May 28, 2011

Chettinad Chicken


Photobucket


I'm a big fan of chettinad cuisine, just the thought of the Beef Chettinad that I had in Goa, during our vacation in Decemeber, still makes my mouth water. But I haven't tried a lot of chettinad cuisine at home, other than this Egg Chettinad I had made long back. Rj had to go out of station on a family emergency n wanted to make something nice for him for dinner the day before he left.

Photobucket


In a situation like this, I find it easy to rely on cooking expert Sanjeev Kapoor's recipes. I have complete faith in his recipes, like I always say they will never let you down, even if you are trying it for the first time! That's how I decided on  Sanjeev Kapoor's Chicken Chettinad recipe. I have followed his instructions to the last dot n' it was amazing. I have always favoured my Darbar Ki Karahi and Murgh Makhani recipe for chicken if I want to make chicken it for a special occasion, but I have to say, this recipe is gonna be a stiff competition to all my previous chicken recipes. So here you go...

Photobucket


Ingredients:

1. Chicken : 500gms/ half a kilo
2. Dry Red Chilies: 5 whole pods
3. Coconut: 1/2 (scraped)
4. Poppy seeds (khuskhus): 1 tsp
5. Coriander seeds: 1/2 tsp
6. Cumin seeds: 1/4 tsp
7. Green cardamom: 1no
8. Clove: 1no
9. Cinnamon: 1/2 an inch piece
10. Star anise: 1/2
11. Fennel seeds (saunf): 1/2 tsp
12. Ginger: 1 inch piece  (roughly chopped)
13. Garlic: 5-6cloves
14. Oil: 1/4 cup (the original recipe used olive oil, but I used regular sunflower oil)
15. Onion : 1no (medium) chopped
16. Curry leaves: 10-12
17. Tomato: 2 small or 1 large (chopped)
18. Red chili powder: 1/2 tsp
19. Turmeric powder: 1/4 tsp
20. Lemon juice: as per taste
21. Coriander leaves: 1tsp (chopped)
22. Salt: as per taste

Method:

Step 1: Roast dry red chillies, coconut, poppy seeds, coriander seeds, cumin seeds, green cardamom, cloves, cinnamon, star anise, fennel seeds in 1 tbsp of oil

Step 2: Grind the above into a paste along with ginger and garlic. (my mallu instinct worked overtime n' i tried using my new stone pestle n' mortar unsuccessfully to do this, so I had to do a little twist later, which I will mention)

Step 3: Heat the remaining oil in a kadai/wok and fry onion till golden. Add curry leaves and the ground paste and sauté for some time.

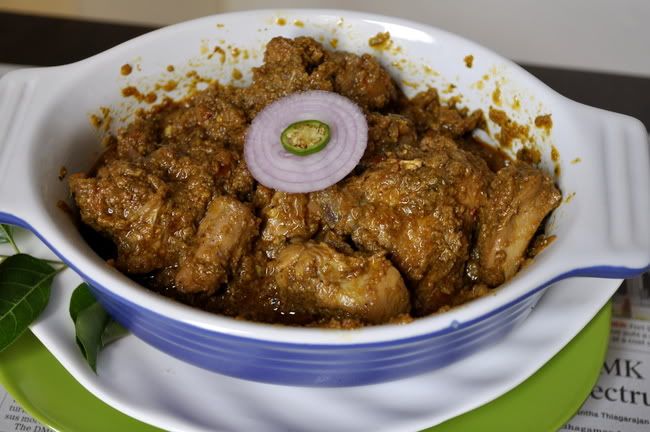
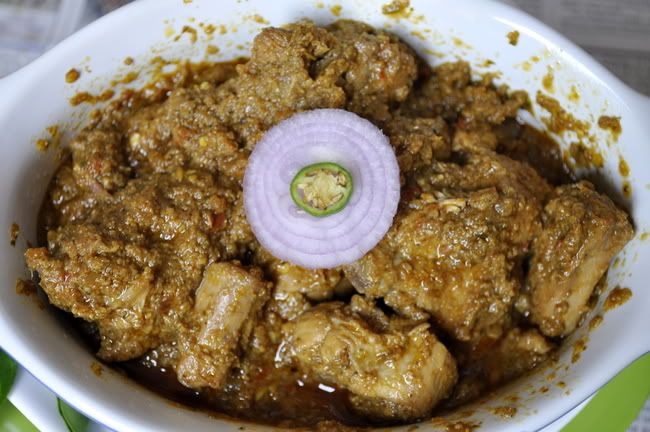
Step 4: Add tomatoes, red chilli powder, turmeric powder and salt to taste. (at this stage I could see that my paste needs to be a little more ground n ground the same in a mixer grinder to a fine paste. That is the reason why you can't see any tomato pieces or curry leaves in my pictures) Once I ground the same into a thick paste, I sauteed them for a min more in the same kadai without adding more oil.

Step 5: Add chicken and mix. Cook for five minutes and then add two cups of water, lemon juice, cover and cook till the chicken is done.

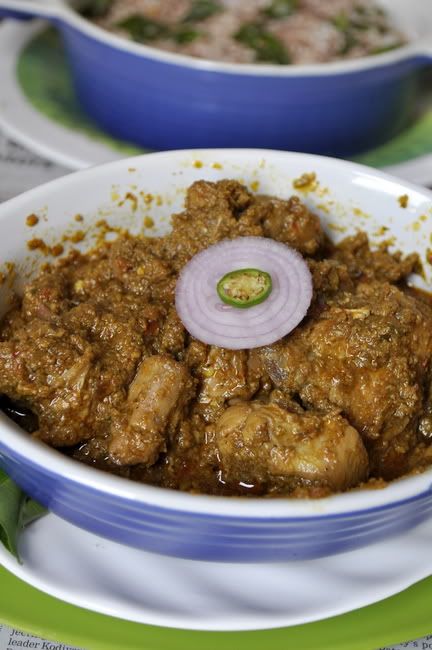
Step 6: Serve hot garnished with coriander leaves.

Photobucket


It is best served with hot rice or chapathi or even paratha. But I served it with puttu, coz after taking time out to decide on what to make n' the whole process above I had time only for something simple like puttu. :) Happy Cooking!!!

Photobucket

Wednesday, May 18, 2011

Chicken Sammies

I'm feeling all down just coz my bestie, Nidz is unwell n' is not on FB today...:(....I would love to type more here just to keep myself occupied but don't want to bore you :)....So coming to this post, I love having sandwiches for breakfast especially on weekends, they are simple, easy n' you can add just about anything you fancy as an ingredient and it never fails...My amma specialises in sandwiches n soups I think (she makes them in a jiffy). She insisted I keep a few pieces of the chicken aside last week before making a curry and guess what? I was able to use that for these sammies. ;)I love referring to sandwiches as 'Sammies'. I made just enough for 3ppl, so please increase the quantity as per your requirement. Here you go...

Photobucket


Ingredients:

1. Bread: 10slices
2. Chicken: 4-5 boneless pieces (medium sized- make them smaller to cook faster)
3. Onion: 1no (medium) finely chopped
4. Green Chili: 1 no (finely chopped)
5. Ginger: a really small piece (chopped or coarsely crushed)
7. Carrot: 1no (grated)
8. Coriander/ Cilantro Leaves: 1tsp (chopped)
9. Salt
10. Pepper
11. Oil
12. Butter: for spreading
13. Egg: 1no
14. Cheese: (optional)

Method:

Step 1: Cook the boneless chicken (small) pieces with a little salt n very little water. Keep checking to see if the water has evaporated. (Add little more water if n when you see that the water has evaporated before the chicken pieces are cooked through). Once done, keep it aside to cool.

Step 2: In a pan heat oil, add the chopped onion, green chili n' ginger and allow it to cook well.

Step 3: Add the grated carrots to the above n' keep it covered and cook it for 3-4mins.

Step 4: Scramble the egg in a separate pan and add the scrambled eggs to the above.

Step 5: Shred the chicken pieces and add it to the above along with chopped cilantro.

Step 6: Keep it covered n' cook for another 2mins, stir well n' adjust the salt. Add freshly ground pepper according to your preference of spice. (you can add a little garam masala instead of pepper at this point if you want, though I didn't do so)

Step 7: Spread some butter on one slice of the bread, add the filling, top it with some shredded cheese (if you are using any) cover it with another slice n' grill it in a sandwich maker.

Photobucket


I think this filling tastes better with grilled than plain bread. I know the snaps aren't looking as 'bite into me' as I wanted them to, but trust me it tastes great. I'm sending this also to the event Souper (Soup, Salad & Sammies) Sundays hosted by Deb from Kahakai Kitchen. Happy Cooking!

Photobucket

Wednesday, April 27, 2011

Chicken Aioli Salad

I'm in love with Jamie Oliver, I have been since a while now. To me no one is as rustic as he is in the kitchen. I haven't tried very many of his recipes, but he has this knack to make you love simple food. His TV shows, with him, in his kitchen garden nipping n' cutting, fills me with a need to have a kitchen garden of my own. :)

Anyways, let me just stop gushing about him (for the time being) by saying that I have used his Aioli Recipe for this simple chicken summer salad. Aïoli is a lovely fragrant and pungent type of mayonnaise.

Photobucket

The ONLY (n' I mean "only") non veg junk food I love is this Chicken Pop corns on the KFC menu. I don't eat chicken burgers, i don't eat chicken wraps n' I don't eat their speciality Kentucky Fried Chicken. But these pop corns.....I find myself craving for them. Today having spend the whole morning out in the sun, I decided to get one portion of these Chicken Popcorn for myself to snack on while walking to the bus stop. But as I was stepping out of KFC, I saw my bus standing at the traffic signal n' rushed to get on it. I thought I'll eat them once I reach home savouring each piece one at a time. (lol...now do you know how much I love them??) While on the bus I started imagining this Chicken Salad with some crunchy greens and a rich creamy sauce using these chicken popcorn. This salad captures the essence of summer for me. Light, Crunchy n' Creamy. So here you go...

Photobucket


Ingredients:

For Aioli
1. Garlic: ½ a small clove of garlic (peeled)
2. Salt: as per taste*
3. Egg yolk: 1 (large)
4. Dijon mustard: 1 tsp
5. Extra virgin olive oil: 2 tbsp
6. Olive oil: 2tbsp
7. Lemon juice: to taste
8. Black pepper : as per taste (freshly ground)

*The Dijon mustard I bgt was already salty, so I have had to use very little extra salt.

For the Chicken
You can either grill some boneless chicken pieces or use a little spicy batter to deep fry small boneless chicken pieces (either way its gonna taste good)

Other Ingredients
Walnuts: 6-7 nos (chopped)
Strawberry: 2-3 (really ripe ones)
Lettuce Leaves: as required (I used Iceberg Lettuce coz they are so crunchy)
Alfalfa Sprouts: as required

Method:

Step 1: Crush the garlic and some salt in a pestle and mortar.

Step 2: Whisk together the egg yolk and mustard in a bowl

Step 3: Start to add your olive oils bit by bit. Once you’ve blended in a quarter of the oil you can start to add the rest in larger amounts.

Step 4: When it’s all added in and blended well, add the garlic and lemon juice.

To finish it off the sauce, season to taste with salt, pepper and a bit more lemon juice if needed.

Step 5: Add the chopped walnuts to the Aioli. Add the shredded/torn lettuce leaves (tear the leaves with your hands, its better) to this and toss the leaves well with your hands. Into a plate, serve some of the coated leaves, sprinkle some alfalfa sprouts, the chicken pieces and chopped strawberry and its ready.

Photobucket

Sunday, April 11, 2010

Murgh Makhani urf Butter Chicken

Butter chicken or Murgh Makhani is an Indian dish from Punjab, they say this dish is among the best known Indian foods all over the world. The origins of butter chicken can be traced back to Delhi, during the period of Mughal Empire. While the dish's general recipe is well known, the actual flavor can vary from restaurant to restaurant even within India. Its gravy can be made as hot or mild as you like so it suits most palates. Butter chicken is usually served with naan, roti, parathas or steamed rice.

The recipe i have used here is again from Camellia Panjabi's 50 Great Curries of India. This dish is really creamy and so tasty. What really surprised me was how rich this curry is, i have loved having Butter Chicken in restaurants but only when i got down to preparing it did i realise how rich it is...hence i'm against the idea of making this an every week chicken dish at home....So i'm bookmarking this recipe for guests.;)

Ingredients:

1. Chicken : 900g (use small pieces on the bone or boneless pieces)
2. Oil: 4-5 tbsp

For the marinade:

1. Yoghurt: 2 cups (full-fat or a carton of plain yoghurt)
2. Garlic Cloves: 6nos
3. Fresh Ginger: ½” piece
4. Red Chili Powder/ Paprika: 3/4 tsp
5. Coriander Powder: ¼ tsp
6. Cumin Powder: ½ tsp
7. Garam Masala Powder:
8. Salt: ½ tsp
9. Lime Juice:

For the makhani sauce:

1. Tomatoes: 700g
2. Kasuri Methi (dried fenugreek leaves): ½ tsp
3. Chilled Butter: 75g
4. Paprika: ½ tsp
5. Vinegar: few drops
6. Garam Masala Powder: ¼ tsp
7. Salt
8. Single Cream: 40g

Method:

First prepare the marinade

Step 1: Place the yoghurt in a piece of muslin and leave to hang to allow the whey to drip away ( I have read this is how you make “hung curd” but I didn’t do this as I thought the yogurt I’m using is thick enough).

Step 2: Purée the garlic and ginger in a blender (I just crushed them into a coarse paste using a good mortar and pestle) Add this and the marinade spices, salt and lime juice to the yoghurt and mix well.

Step 3: Make gashes in the chicken if using pieces on the bone. Marinate the chicken in the yoghurt mixture for at least 1 hour, preferably 2; for best results leave overnight.

Once this is done and you are ready to cook

Step 1: Heat the oil in a large, thick-bottomed skillet and put in the chicken with the marinade. Cover and cook over a low heat until done. Turn the chicken over during cooking.

Step 2: While the above is going on scald the tomatoes for the makhani sauce and peel off the skin. Reduce to a semi-pulp with a fork or potato masher.

Step 3: Put the tomato pulp into a frying pan and cook for 5 minutes or so until the liquid has evaporated slightly.

Step 4: Add the chilled butter and paprika; after the butter has melted, let it cook for just 1 minute. Taste… if it has no sourness; add a few drops of vinegar.

Step 5: Add the kasuri methi and garam masala powder and salt to taste.

Step 6: After 30 seconds, add the cream and stir. The sauce is now ready. Add in the chicken pieces and mix well. Serve immediately.

p.s. my snap for this dish has also gotten accepted on foodgawker....yeah yeah yippee yippee....;)

Saturday, March 27, 2010

Chicken Bharta


Honestly, I wasn't sure about the snap i'm putting up. But the recipe is good and turns out really well. So i couldn't resist putting it up. I was so late for work, there was just no time for my average effort at creativity. Maybe the next time i make this dish, i'll have some more time for a better snap...:)

So coming back to the recipe, i feel like i'm rediscovering 'Nita Mehta' all over again, i mean i have had her cook book with me for over 5yrs n' have taken it out rarely. So anyways, thats my mistake, now that i have taken it out, i'm finding such really nice recipes in there. I had separated the boneless pieces when i was making my Chicken Karahi and used those pieces to make this dish. So here you go...

Ingredients:

1. Chicken (boneless): 500gms (cubed)
2. Onions: 3 nos (chopped)
3. Saboot Dhania (coriander seeds): 1 ½ tbsp
4. Dry Red Chili: 2nos
5. Ginger: 1 ½ inch piece (chopped)
6. Garlic: 10 flakes (chopped)
7. Tomatoes: 3nos (chopped)
8. Tomato: 1no (puree in a mixer)
9. Garam Masala: 1tsp
10. Coriander Powder: 1tsp
11. Amchoor: ½ tsp
12. Green Chilies: 2nos (whole)
13. Coriander: 2tbsp (chopped)
14. Kasthuri Methi: 2tbsp
15. Oil: 5tbsp
16. Salt: to taste

Method:

Step 1: Put coriander seeds and red chilies on a tawa. Keep on fire and roast lightly till it just starts to change color. Do not make it too brown.

Step2: Crush the coriander seeds to split the seeds. Break the red chilies with hands into small bits. Keep aside.

Step3: Heat oil in a wok and add chopped onions, cook it till golden brown.

Step 4: Add crushed coriander seeds, ginger and garlic. Stir for a minute or so.

Step 5: Add chicken and stir fry for 4-5minutes on medium heat.

Step 6: Add chopped, pureed tomatoes and red chilies to the above and cook for another 4-5mins.

Step 7: Add salt, garam masala, dhania powder and amchoor. Mix well. Cover and cook on low heat for 6-8minutes.

Step 8: Lower the heat, stir, add whole green chilies, coriander leaves and kasthuri methi leaves. Cook for another 4-5minutes or till done and serve hot.

Monday, March 1, 2010

Chicken Masala


This chicken curry is something I can make in my sleep…i have made it so often…i don’t even know how I started making it in the first place….its a combination of a recipe from my mom n’ some other recipe I saw somewhere…either ways…its on my quick fix list…if I ‘m feeling really lazy or I’m short of time…but I want to make an impression….then I make peas pilaf and this curry n’ my husband is a happy man….he really likes it…so here you go

Ingredients:

1. Chicken- 900gms (medium to small pieces)
2. Onion- 2nos (medium- chopped)
3. Ginger Garlic Paste- 1tsp (preferably fresh)
4. Tomato- 1no (chopped)
5. Green Chili- 1no- Slit into 2 (optional)
6. Chili Powder- 1tsp (use kashmiri chili powder if u don’t like spicy food)
7. Turmeric Powder- ½ tsp
8. Coriander Powder- 1 tsp
9. Garam Masala- ½ tsp
10. Cumin Powder- ½ tsp
11. Bay leaf- a small piece
12. Cinnamon- a small piece
13. Jeera- ½ tsp
14. Cardamom- 4nos
15. Cloves- 2-3nos
16. Black Pepper- 1tsp (coarsely crushed)- less if you don’t want it to be spicy
17. Salt- 1tsp or as required
18. Oil- 4tbsp (I use only 2 most of the time)

Method:

Step 1: Pressure cook the chicken pieces adding salt and crushed black pepper. No need to add any water. One whistle is enough.

Step 2: In a wok, heat the oil n’ add Bay leaf, Cinnamon, Cardamon, Jeera and Cloves.

Step 3: Add chopped onion and fresh ginger garlic paste to this. Sauté it until the onion turn golden brown.

Step 4: Add chili powder, turmeric powder, coriander powder, garam masala, Cumin Powder to this. Add a little water if the mixture seems too dry. Allow the masala to cook well and oil to separate.

Step 5: Add chopped tomatoes to this. Allow it to cook for a 4-5mins n’ then mash it with a potato masher (if u don’t have this, as round bottom spoon should do). You can add ready tomato puree (½ cup) instead. Allow it to cook well and oil to separate from the gravy.
Step 6: The chicken will have a small amount of liquid/stock inside the pressure cooker. Add this to the above gravy and mix well. Add the slit green chilies if you are using them at this stage.

Step 7: Add the chicken piece to this gravy n’ cover it n’ cook it for another 5-10 mins. You can add coriander leaves for garnishing before serving.

I think its best served with any rice dishs or chapathis (might be a little too dry for chapathi). When I’m serving this with chapathi I will try n’ increase the level of water slightly in step 4.

Monday, July 27, 2009

Guacamole- The Chunky Avocado Dip

I'm ashamed to say that i would have never tried this amazing Spanish dip, had it not been for my Brazilian friend in office. She had made some at home and got some for us to office. She had got some tortilla chips too....n' i loved it.
Avocados are also called butter fruit back home....something i refused to eat (like most things!) till i reached Bangalore. There i had a pregnant colleague and she used to have Avocado Milkshakes everyday. All the health talks of the good cholesterol in it n' all convinced me to try it too...n' i fell in love. Oh i can have it any day anytime...i convinced Robin to try it and he disliked the creamy feel n' taste...;)

Well now you know my reservations about trying the guacamole recipe at home....anyways...i went ahead with my plan last night. I served this with some spicy grilled chicken. So here we go...

Ingredients

Avocado : 1no (ripe)

Onion: 1/2 (finely chopped)

Green Chili: 1no (chopped)- avoid this if you don't want it even lightly spicy

Cilantro Leaves: 1tbsp (finely chopped)

Mint Leaves: 3-4nos (finely chopped) - (the authentic recipe does not ask you to add this...adding this brings a freshness i love... so this is completely optional.)

Lime/Lemon Juice: 1 1/2 tsp

Salt: as per taste

Method

Step 1: Cut the avocado in half n' then cut both the pieces into 2 again. This will help you remove the seed and to peel the skin.

Step 2: Cut the peeled avocado into smaller pieces (cubes). Mash it using a fork. Add chopped onion, cilantro, green chili, mint, lemon juice and salt and mash some more.

This is ready, cover (to prevent oxidation from the air reaching it) and refrigerate before serving.

The measurements given here is enough for 2 people but if you are cooking for more people, please increase the measurements accordingly. My friend had added chopped tomato as well. I didn't use it this time, but i read that if you are using it then you should add this to the mixture only while serving it or just before. Robin ate it as well and he didn't guess the main ingredient n' i refused to tell him now that he liked it a lot. ;) The grilled chicken recipe is borrowed and you can find it here in my friend's blog. http://mykitchenantics.blogspot.com/

Monday, June 8, 2009

Appam and Chicken Stew

Anyone born and brought up in Kerala knows how important an appam n' stew meal is. For some reason appam and stew was always made at home when we have an occasion or when we have some special guests for breakfast. Truth be told the most awesome appam i had wasn't made at home.

We have a family near our place who are famous in Kottayam for their appams. There used to be a long line of cars on the roads waiting to pick up their order from this small house, esp during Easter, Christmas and New Year. This family of 5 doles out the sweetest appam i have ever had, with edges around it looking like white lace made of frosty snow! Whenever we order appam from there, i used to get sent to pick it up and as usual Papachan (the man there) would give me one to eat while i wait. Eat it without any curry and it would still taste divine! Anyway the point is, somehow all this gave me the impression that appam and stew is an extremely difficult dish to prepare and thats the reason why its gets prepared so rarely at home.

So when we invited some friends over for Easter i decided to make it. My mom was against the idea of making something the first time when we are having guests over. I can understand what she means but, i just had to make it this time. It came out so well.....i decided to serve it while making them...hot from the pan...and 4guyz ate 33appams, i'm not exaggerating! I was exhausted by the end of it. After that i haven't made appams yet. Its kinda difficult. But the chicken stew is a great dish that's so easy to make and can be served with Bread too.

APPAM

Ingredients
Fine rice powder (Iddiappa podi)- 2cups
Cooked Rice- 3/4th cup
Coconut (Ground)- 3/4th cup
Sugar- 2tbsp
Yeast- 1/2 tsp
Salt- to taste
Water

Method
Step 1: Grind coconut well in a mixer grinder with just a little water.

Step 2: Add cooked rice to the above and grind well.

Step 3: Add rice powder (with a little water to soak), yeast, salt and sugar to the above and grind the entire mixture until smooth.

* The time required for the mixture to rise is 2hrs- after which the mixture is ready to make appam. (Keep it somewhere or on something hot)
** If to be made later the mixture needs to be stored in the fridge after the above procedure.

Step 4: Use an appam wok to make the ones with the lace or use a normal flat wok for flat round ones like a thick pancake.
CHICKEN STEW

Ingredients
Chicken *- ½ kg (medium pieces)
Small Onion- 10nos (crushed or julienned)
Big Onion- 2 big or 3 medium (cubes)
Ginger- 1 inch piece (sliced)
Green Chili- 4-5nos
Potato- 1 (cubes)
Vinegar- ½ tsp
Coconut Milk- 1cup
Milk- 1 cup
Maida- 1 tbsp
Cloves- 2-3 nos
Peppercorns- 5-6 nos (crushed)
Salt- to taste
Mustard Seeds
Curry Leaves
(Vegs like carrot, green peas etc are optional)

Method
Step 1: Cook the chicken pieces, small onions, big onions, ginger, green chili, potato, salt and vinegar in a pressure cooker till one whistle.

Step 2: Mix milk & coconut milk in a separate bowl. Add maida to this and mix well. Add cloves and peppercorns into the milk mixture.

Step 3: Prepare a tadka (oil, mustard seeds & curry leaves)

Step 4: Open the pressure cooker lid (once its safe) n’ light the burner again. Add this milk mixture to the cooker n’ cook on really low fire. Stir well. Once the curry thickens to your preference, add the tadka and the stew is ready.

* you can follow the instructions above to make fish or mutton stew too. For fish, i guess one should avoid using the pressure cooker mentioned in step 1.
Related Posts with Thumbnails