Pages

Showing posts with label North Indian. Show all posts

Friday, May 27, 2011

Sprouts Masala (Dry)

Today I was looking for a snap I had clicked of my niece a while back n' I found 3 dishes that I had not posted up here yet :). (This is dish no. 2 ). All these snaps were taken a little after we moved to Bangalore. I'm guessing, I just didn't have the time to post them up then. I'm gonna post all three today, just coz I already have too many dishes I had made this week which i'm yet to post. These recipes are good, but the snaps lack imagination, so don't let that fool you.

Photobucket


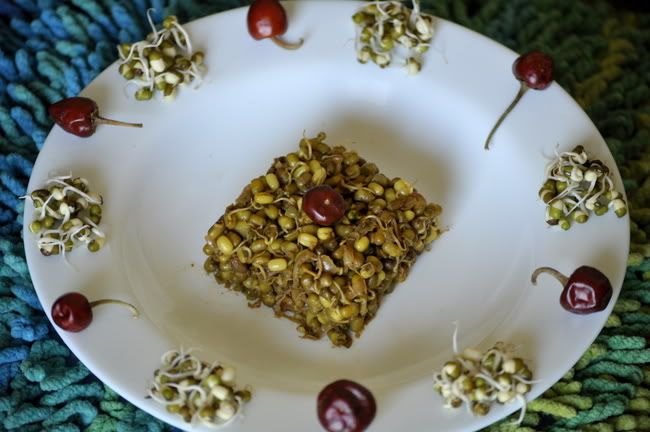
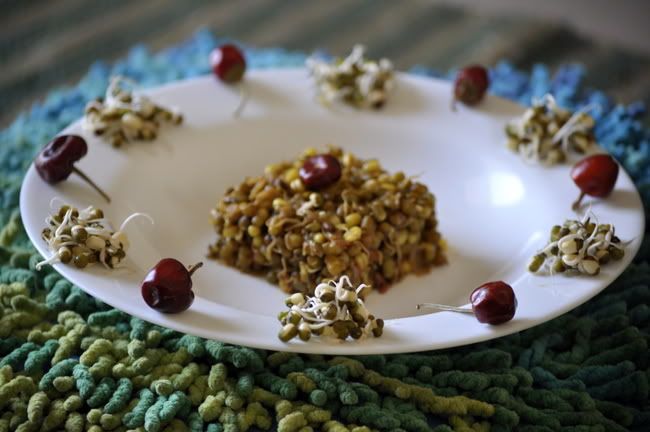
I love having sprouts, you must have figured that out from the salad recipes, like Chicken Aioli Salad n' my Spinach Salad with Alfalfa Sprouts n' Feta Cheese here. We normally eat it fresh in a salad n' since that taste great, I never thought of trying anything else. But my mom in law makes this really nice dry masala with this n' Rj is a big fan. Besides, who wouldn't like making a dish that their mom in law makes to perfection? lol. Ever since I made this the first time, we have had this as a side dish for chapathi almost every other week. Try it, its really nice... So here you go.

Photobucket


Ingredients:

1. Sprouts: 2 cup (I use Moong sprouts)
2. Onion - 1no (chopped)
3. Garlic: 3-4nos (crushed)
4. Tomato: 1no (small) chopped
5. Salt: as per taste
6. Cumin Seeds - 1/2 tsp
7.Chili Powder - 1 tsp or 1/2tsp (as per taste)
8.Turmeric powder - 1/4tsp or a little more
9.Garam Masala - a pinch or 2
10.Oil

Method:

Step 1: Heat oil in a kadai/wok. Add the cumin seeds n' let is splutter.

Step 2: Add the chopped onion n' crushed garlic to this. Fry it till the onions become translucent.

Step 3: Add the turmeric powder n' chili powder to the above. Stir it, allowing the masala to cook.

Step 4: Add the chopped tomatoes to this. Let it mix well in the masala. Add salt.

Step 5: Add the sprouts to this n' mix it well with the masala. Sprinkle some water on top n' cover it to cook it for 8-10mins. If it too dry stir it once in a while so that it doesn't stick to the bottom of the pan.

Step 6: Stir the above, adjust the salt, sprinkle some garam masala on top. Mix it well n' its ready to serve.

If you would like to give this dish a little pungent taste, sprinkle some lemon juice over it before serving. Happy Cooking!!!

Photobucket

Tuesday, May 17, 2011

Pani Puri- Nirvana at Home

Photobucket


I had gone missing from blogsphere for a week simply coz I had a home full of loved ones n' was happy being busy. My mom n' my sister n' family were here with me for a vacation n' I had a great time with them....the best part about moving back to India is the amount of time I get to spend with my family. Coming back to this post. I can easily call Pani Puri my all time favourite snack....when I say all time, I really mean it....I can have it all the time/ anytime of the day n' relish it. For those who have never had it, Pani Puri is a popular street snack in India. It comprises a round, hollow puri, fried crisp and filled with a mixture of water, tamarind, chili, chaat masala, potato, onion and chickpeas. It is small enough to fit completely in one's mouth. The first time I had them was when I moved to Bangalore for my studies 10yrs back. I couldn't hold the whole puri in my mouth the first time around n' I remember thinking to myself 'how did I live to be 20 without ever tasting this?' I hunt for the best Pani Puri joint everywhere I go. In Bahrain, I had a Biharikaka who made such divine pani puri....n' he wud give me 2 extra sukka puri just to see how happy it made me, I think. ;)

Photobucket


I could have pani puri off the street vendor n' not think too much about it, but gone are those days....i'm more concerned about hygiene of the food n' the environment now. I don't eat pani puri or anything which uses water or fresh fruits n' veggies from a street vendor anymore. My youngest cousin,Indhu, who I love more than I can say, recently got typhoid n' was in really bad state. She was admitted in the hospital for 2weeks n' she has a small baby gal aged just over 1yr...everyone was so so worried about her. But now she is feeling better, the once healthy gal has become less than half her size, with really bad intestinal problems. I'm mentioning this in detail just so I can give out a word of caution to all who likes to eat from the streets. She caught it eating chat n' drinking some masala drink from one of the street vendors in Delhi. I also have to mention that her sis in law who ate/drank from the same place is ok. But really, the moral of the story is just that one needs to be cautious of where and what you are eating.

Photobucket


Koshy's Calcutta Chat on Brigade Road dishes out the best chat in town for me, including a good pani puri. But that being a little far off n' me not frequenting Brigade Road anymore meant I have to find a new source...My mom n' my sister loves pani puri too, so I decided to make it for them. My mom found it hilarious that she has to wait for me to finish taking some snaps before they could dig in....lol..;). I used ready to use small puris n' pani puri masala for the water. So here you go.

Photobucket


Ingredients:

1.Puri: 20nos

For the Filling:

2.Potato – 3 nos (medium-sized, boiled with salt, peeled and mashed)
3.Garlic – 2 to 3 pods (finely chopped)
4.Ginger – 1/2″ long piece (crushed/minced)
5.Coriander/Cilantro – 2tbsp (finely chopped)
6.Green Chili (optional) – 1 no (finely chopped)
7.Chili powder – 1 tsp
8.Garam Masala – 1 tsp
9.Cumin Powder – 1 tsp
10.Coriander Powder – 1/4 tsp
11.Amchur Powder/ Dry Mango Powder (optional) – 1/2 tsp
12.Salt – to taste
(add some fresh moong sprouts to get some extra flavour, I didn't have any with me so I didn't add it this time.)

For the Water:*

13. Everest Pani Puri Masala: 2tbsp
14. Lemon Juice: of half a lemon (medium size)
15. Mint Leaves: a palm full (crushed)
16. Salt: as per taste (keeping in mind that the masala already has some salt in it)
17. Green Chilli Paste: 2tsp
18. Tamarind Pulp: 2tsp
19. Dry Mango Powder: a pinch or 2
20. Water: as required (i used roughly 2cups)
21. Boondi
22. Chopped Onion

*all the ingredients mentioned under pani puri water, can be adjusted according to taste. I have mentioned how much I have used, but change it according to your taste.

Photobucket


Method:

Step 1: Mix all the ingredients required for the Pani Puri water n' keep it aside. If you like the water chilled, keep this mixture in the refrigerator at this point. (I don't like mine chilled so I didn't do this). Do not mix the boondi n' chopped onions at this point. You can add that on top while serving.

Step 2: Mash the boiled potatoes n' mix all the ingredients. Keep it aside.

You are actually ready to serve. Even though the list of ingredients seems long, it requires hardly any prep time. Also, if you want to serve it to guests, you can do all the preparation in advance n' make the holes in the puri n' stuff the filling in, dip it in the pani puri water n' there you have it....;) mouthful, eyeful n' wonderful....lol

Photobucket

Tuesday, May 3, 2011

Dal Makhani

I wasn't particularly fond of Dal Makhani (have on many occasions tasted bad ones) until we went to Mast Kalandar-a North Indian vegetarian food chain popular here in Bangalore. Rj orders for the meal option Phindi Chole almost every time we go there. Along with Chole n' Roti comes this really tiny bowl of Dal Makhani n' I love the texture n' the taste. Its just so so creamy. So I decided if they could make it taste this good, I could at least try making it at home.... :)

Photobucket


I had two choices for recipes to follow, one was from the book Learn to Cook by Nita Mehta and the other option was to follow Sanjeev Kapoor's recipe. As I was about to start cooking, Sanjeev Kapoor's recipe won by a thin margin coz Nita Mehta's recipe called for 'jaiphal powder' as one of the ingredients and I had no clue what that was. Only after I finished cooking did I get a chance to google that....n' found that she just meant Nutmeg Powder...lol

Although my intention is not to specialize on Sanjeev Kapoor recipes, I might just end up doing that at this rate. So here you go...:)

Photobucket


Ingredients:

1. Whole Black Gram or Urad Dal: 1/2 cup
2. Red Kidney Beans or Rajma: 2 tbsp
3. Salt to taste
4. Red chili powder: 1 tsp
5. Ginger: 2 inch piece (chopped)
6. Butter: 3 tbsp
7. Oil: 1 tbsp
8. Cumin seeds: 1 tsp
9. Garlic: 6 cloves (chopped)
10.Onion : 1 large (chopped)
11.Green chillies: 2 (slit into 2)
12.Tomatoes: 2 medium (chopped)
13.Garam masala powder: 1 tsp
14.Water: as required for cooking

Method:

Step 1: Wash and soak sabut urad and rajma overnight in three cups of water. Drain.

Step 2: Pressure cook sabut urad and rajma in three cups of water with salt and half the red chili powder (you can add half the ginger too if you wish) for three whistles. Open the lid and see if the rajma is totally soft. If not cook on low heat till the rajma becomes totally soft.

Step 3: Heat butter and oil in a pan. Add cumin seeds.When they begin to change colour, add ginger, garlic and onion and sauté till golden.

Step 4: Add slit green chillies, tomatoes and sauté on high heat. Add the remaining red chili powder and sauté till the tomatoes are reduced to a pulp.

Step 5: Add the cooked dal and rajma along with the cooking liquid. Add some water if the mixture is too thick.

Step 6: Add garam masala powder and adjust the salt. Simmer on low heat till the dals are totally soft and well blended. Serve hot.

Best served with rice and roti. I think this recipe is little less richer than the ones which asks for cream as an ingredient and I would call this a really easy recipe. Another surprising thing about this recipe and the Rajma Recipe is that it tastes even better when served the next day. :) Happy cooking!

Photobucket

Tuesday, April 19, 2011

Aloo Parathas- Coined by Me

I wanted to call this post...'Coin Aloo de Parantha'...but RJ says that sounds all wrong (especially coming from a mallu gal) ;)...but i liked the ring it had...:). I think any mallu worth their salt knows about 'Kerala Coin Parotta'. I really enjoy them, but I have wondered on why they are called that...they are small but definitely bigger than a coin....so why are they called 'coin parotta'? Anyone who knows the answer please let me know.

I have made Aloo Parathas only couple of times before n' they weren't all that great...I have tried different recipes but I didn't get them right. But i'm glad to say all that is ancient history. If you have had a similar experience, well try this recipe here n' you'll be thrilled with the results. I'm in love with this recipe. ;) (well...what can I say i'm almost always overjoyed by simple pleasures in life!)

Photobucket

My blogger friend Madhuri from Cook Curry Nook posted this recipe for Cabbage Parantha couple of days back n' again I had this desire to try it out. RJ as it is gets a little worried when I tell him I'm making an attempt at aloo parathas (you know the history!), so didn't want to scare him with more veggie options. I know Mads is a great cook, so I followed her instructions n techniques to the t, other than changing the main ingredient n changing a few measurements here n' there. It was a huge hit n' we both loved it. Couldn't take any snaps last night though.

But I had some leftover filling and made them again for lunch today, just for me. ;)
And to add a little masti, I made them small like Coin Parathas today. ;) The idea to make them small came to me when the last atta ball turned out to be really small. So here you go. You can make 10 regular sized parathas using this recipe.

Aloo Paratha

Ingredients:

For the Dough:
1.Whole wheat flour – 3 cups (plus extra for dusting)
2.Salt – to taste
3.Water – as required
4.Oil – 1 tbsps

For the Stuffing:
1.Potato – 3 nos (medium-sized, boiled with salt, peeled and mashed)
2.Garlic – 2 to 3 pods (finely chopped)
3.Ginger – 1/2″ long piece (crushed/minced)
4.Coriander/Cilantro – 2tbsp (finely chopped)
5.Green Chili (optional) – 1 no (finely chopped)
6.Chili powder – 1 tsp
7.Garam Masala – 1 tsp
8.Cumin Powder – 1 tsp
9.Coriander Powder – 1/4 tsp
10.Amchur Powder/ Dry Mango Powder (optional) – 1/2 tsp
11.Salt – to taste

Method:

Step 1: Prepare a dough as you would for chapathis. Cover and set aside for atleast 15-20 minutes.

Step 2: In the meantime mix together all the ingredients for stuffing (except salt) and set aside. (Madhuri gives a tip here asking us to add the salt only at the end as you are about to roll out the parathas as it will make the studffing soggy otherwise). If you have already used salt to boil the potatoes, just be careful while adding more.

Step 3: This is best served hot so once you are ready to begin, take a small amount of the roti dough, dust with some flour and flatten with a rolling-pin. Dip your finger in oil (keep aside a small bowl of oil just for this) and spread it onto the side where you are gonna keep the filling. (this is not part of the recipe from Madhuri) Also, if you want to make coin parathas make dough ball really small or you can do the needful in step 5)

Step 4: Put a nice heaped tbsp of stuffing in the centre and draw the edges of the dough towards the centre to cover the mixture.

Step 5: Dust with more flour, and roll out to a thickness that you want for your parathas. (Madhuri says Too thick a parantha will not cook well and too thin will break/crumble easily.) If you want to make coin parathas, cut it into small round circles using a cookie cutter, I had done this only after making the parathas. But if you do it at this stage, you won't waste any dough.

Step 6: Heat a tawa and cook the parantha on a medium flame. Remembering that this takes longer to cook than chapathis.

Step 7: Increase the flame at this stage and use butter or oil to cook the parantha on both sides. Lightly press it on to the tawa on each side to cook and get a nice crispy texture on top.

Masala Curd

Another good thing about this dish is it doesn't need a curry to be served along with this. You can serve it with some nice yogurt/curd and pickle. I whipped the curd to make it smooth and added a little salt and a little cumin powder to get the right flavour.

I'm leaving the amount of oil/butter to be used for this recipe upto you, Can't share how much I used n' but it did taste really good. :) Compared to the phulkas I make everyday this was definitely sinful. So as a sinful indulgence once in a while it is fine, but not as an everyday meal.

The below snap is of the flowers that can be found all over Bangalore now. It is from a tree close to my place. Bangalore in bloom is just so so pretty.

Photobucket

Thursday, April 29, 2010

Mutton Masala- n' my Relocation Challenges


Ok, this post has been living in my draft long enough i guess....i made this a while ago but i was lazy to type the recipe from the book n' it's just been lying there...so i decided to take control of the situation n' type out the whole thing late last evening.

There are just way too many changes happening in my life right now...we are relocating back to india (from bahrain) n' we are slowly selling of things we don't (or rather can't) take back home n' will have to start sending off things home that we want to take back with us....so with all that happening...i'm gonna be fridge-less, oven-less, gasburner-less n' most likely pots n' pans less for a month or a little while longer....imagine that???....i'm dreading the thought...but at the same time it feels like it's gonna be a challenge to win over....lol...so if you guyz don't find me here for a while, or if you find my serving dish n' cooking dish is the same you will know why.....i'll be back with a lot of energy n'zing in sometime....but for the time being i'm thinking what will our meals be like this coming month....so please do wish us well...:)...again this recipe is from my Nita's Mehta's cookbook...so here you go...

Ingredients:

1. Mutton: 500gms (preferably use pieces with bones)
2. Onions: 4 medium (chopped)
3. Ghee or Oil: 5-6tbsp (used only 3tbsp)
4. Bay Leaf: 1no
5. Garlic: 8-10 flakes (crushed to paste)
6. Ginger: 1" piece (crushed to paste)
7. Salt: 3/4tsp or as per taste
8. Red Chili Powder: 3/4 tsp
9. Garam Masala: 3/4tsp
10.Turmeric Powder: 1/2tsp
11.Coriander Powder: 1tsp
12.Cumin Seeds: 3/4tsp (crushed)
13.Tomatoes: 4 large (pureed)
14.Green Chili: 1 (chopped) (the original recipe didn't ask for this)
15. Water: 1cup

Method:

Step 1: In a pressure cooker heat oil or ghee. Add the bay leaf and chopped onions. Stir fry for 4-5mins on medium flame till onions turn light brown.

Step 2: Add ginger garlic paste and fry for a minute

Step 3: Add the mutton pieces and cook for 15minutes on medium heat stirring every few minutes.

Step 4: Add the tomato puree to the above and mix well. Stir for 10-12 minutes on high flame.

Step 5: Add salt, red chili powder, garam masala, turmeric powder, coriander powder and crushed cumin seeds to the above. Mix well and cook for 3-4minutes.

Step 6: Add 1 cup water, mix well and close the cooker. Allow it to cook till 2 whistles. Keep on low heat or another 15mins. Remove from fire. Let the pressure drop by itself.

It's ready, transfer it to a serving dish, garnish and serve it hot with chapathis. Honestly, i was more in love with the picture than the dish itself, but i know a lot of mutton lovers in my family n' would love to make this for them again. The only change i'm gonna make is add some more spice to this. It wasn't spicy enough for RJ. ;)

Wednesday, April 21, 2010

Tawa Pilaf- Chaat Style


I have been watching the Sanjeev Kapoor cooking shows on n' off for a while now. If you have seen his shows, you must have noticed how quick they are n' he makes it look like its hardly any work. I have never been good at keeping everything ready n then cooking, i go with the flow n' run all around n' pick things from here n' there. That could be one reason why i have never been able to manage step by step photos on this blog, maybe i will save some time too but i'm not too sure if n' when i will do all that...

So anyways i came across this recipe on his show for tawa pilaf, i have always wanted to try it n' decided to watch the whole show and decided to try it too. But once i finished making it and tasted it, i felt like it was more like a 'Tawa Pilaf-Chaat' than the authentic pilaf (i'm sure there will be an authentic Vegetable Pilaf recipe of Sanjeev Kapoor's somewhere, i plan to i find it n' give it a try)...go through the ingredients list and you will know why i wanted to call it a Chaat....it's really really easy to make, especially so if you have some left over plain rice and want to try something different. So here you go...

* i made enough only for one person, and i'm mentioning the quantity used according to that. (you see i'm still on my "cooking for one" week)

Ingredients:

1. Cooked Rice: 1cup
2. Oil: 1/2 to 3/4th tsp
3. Cardamom: 1no
4. Jeera: 1/2tsp
5. Onion: 1no (chopped)
6. Ginger Garlic Paste: 1tsp
7. Tomato: 1no (chopped)
8. Capsicum: 1/2 piece (chopped)
9. Green Peas: 2tbsp
10.Carrot: 1 small (cut it into small cubes)
11.Beans: 4-5nos (thin slices)
12.Pav Bhaji Masala: 1tsp
13.Red Chili Paste: 1/2tsp (i used paprika powder instead)
14.Lemon Juice: 2-3 drops (add only just before serving)
15.Salt: as per taste
16.Coriander Leaves: 2tsp (chopped)
17.Water

* though the original recipe didn't ask for it, i added one chopped green chili too

Method:

Step 1: Heat Oil in a kadai, add the cardamom and jeera. After 20seconds, add the chopped onion
and ginger garlic paste n' fry it until lightly brown.

Step 2: Add the chopped tomatoes and the other vegetables that you are using. Add a little water and cook for 5mins.

Step 3: Add the pav bhaji masala, chili paste and salt. Allow the masala to cook and you will see oil separating.

Step 4: Add the cooked rice and mix well. Let it cook for a while.

Step 5: Add the chopped coriander leaves and sprinkle the lemon juice. Mix it well and it's ready.

Serve it hot with some masala papad and raita.

p.s. i had called the recipe vegetable biryani by mistake.....they broadcasted the show again i realised the recipe here is Tawa Pilaf by Sanjeev Kapoor n' not Vegetable Biryani. I'm really sorry about the error.

Sunday, April 11, 2010

Murgh Makhani urf Butter Chicken

Butter chicken or Murgh Makhani is an Indian dish from Punjab, they say this dish is among the best known Indian foods all over the world. The origins of butter chicken can be traced back to Delhi, during the period of Mughal Empire. While the dish's general recipe is well known, the actual flavor can vary from restaurant to restaurant even within India. Its gravy can be made as hot or mild as you like so it suits most palates. Butter chicken is usually served with naan, roti, parathas or steamed rice.

The recipe i have used here is again from Camellia Panjabi's 50 Great Curries of India. This dish is really creamy and so tasty. What really surprised me was how rich this curry is, i have loved having Butter Chicken in restaurants but only when i got down to preparing it did i realise how rich it is...hence i'm against the idea of making this an every week chicken dish at home....So i'm bookmarking this recipe for guests.;)

Ingredients:

1. Chicken : 900g (use small pieces on the bone or boneless pieces)
2. Oil: 4-5 tbsp

For the marinade:

1. Yoghurt: 2 cups (full-fat or a carton of plain yoghurt)
2. Garlic Cloves: 6nos
3. Fresh Ginger: ½” piece
4. Red Chili Powder/ Paprika: 3/4 tsp
5. Coriander Powder: ¼ tsp
6. Cumin Powder: ½ tsp
7. Garam Masala Powder:
8. Salt: ½ tsp
9. Lime Juice:

For the makhani sauce:

1. Tomatoes: 700g
2. Kasuri Methi (dried fenugreek leaves): ½ tsp
3. Chilled Butter: 75g
4. Paprika: ½ tsp
5. Vinegar: few drops
6. Garam Masala Powder: ¼ tsp
7. Salt
8. Single Cream: 40g

Method:

First prepare the marinade

Step 1: Place the yoghurt in a piece of muslin and leave to hang to allow the whey to drip away ( I have read this is how you make “hung curd” but I didn’t do this as I thought the yogurt I’m using is thick enough).

Step 2: Purée the garlic and ginger in a blender (I just crushed them into a coarse paste using a good mortar and pestle) Add this and the marinade spices, salt and lime juice to the yoghurt and mix well.

Step 3: Make gashes in the chicken if using pieces on the bone. Marinate the chicken in the yoghurt mixture for at least 1 hour, preferably 2; for best results leave overnight.

Once this is done and you are ready to cook

Step 1: Heat the oil in a large, thick-bottomed skillet and put in the chicken with the marinade. Cover and cook over a low heat until done. Turn the chicken over during cooking.

Step 2: While the above is going on scald the tomatoes for the makhani sauce and peel off the skin. Reduce to a semi-pulp with a fork or potato masher.

Step 3: Put the tomato pulp into a frying pan and cook for 5 minutes or so until the liquid has evaporated slightly.

Step 4: Add the chilled butter and paprika; after the butter has melted, let it cook for just 1 minute. Taste… if it has no sourness; add a few drops of vinegar.

Step 5: Add the kasuri methi and garam masala powder and salt to taste.

Step 6: After 30 seconds, add the cream and stir. The sauce is now ready. Add in the chicken pieces and mix well. Serve immediately.

p.s. my snap for this dish has also gotten accepted on foodgawker....yeah yeah yippee yippee....;)

Monday, April 5, 2010

Lohbia aur Khumbi (Black Eyed Peas with Mushrooms)


Black-eyed peas are called Lohbia in Hindi. Combined with tomatoes and khumbi (mushrooms), lobhia can make a very hearty vegetarian meal. I tried this for the first time and really liked it. This recipe is from the book "Indian Cooking" by Madhur Jaffrey.

Pulses are a part of our everyday food. I used to not like it as much when i started cooking. But now, truth be told, even i enjoy it a lot. Started off with Punjabi Rajma Curry (Red Kidney Beans curry) n' then i started using Moong Dal, Masoor Daal (red lentils), Toor Dal, Black Eyed Peas & Brown n' White Channa regularly. Where i don't like non vegetarian food, RJ just loves it, n' where i love vegetarian food, RJ just hates it. So we had to find a balance somewhere and thankfully legumes came to our rescue. So here you go...

Ingredients:

1. Black-eyed peas: 1 cup
2. Tomatoes: 1cup(chopped)
3. Oil : 1/2 cup (i used only 3tbsp)
4. Cinnamon stick: 1 inch piece
5. Cumin seeds: 1 tsp
6. Onion: 1 cup(chopped)
7. Garlic: 5 cloves (diced)
8. Khumbi (mushrooms): 1 cup (sliced)
9. Coriander Powder: 2 tsp
10.Cumin Powder: 1tsp
11.Turmeric Powder: 1/2 tsp
12.Cayenne: 1/4 teaspoon (i didn't have this so i added nearly a tsp of kashmiri chili powder instead)
13.Coriander/Cilantro Leaves: 2tbsp
14. Salt: as required or 1tsp

Method:

Step 1: The first thing you must do is soak the lobhia in water over night or for 7-8hours. This will make the beans soft and manageable.

Step 2: Then, boil pre-soaked lobhia for 40 minutes or until very soft. (i cooked them in a pressure cooker instead for 15-20 minutes on medium flame, i added salt along with this)

Step 3:Then, briefly boil tomatoes, peel off skin, and chop into large chunks.

Step 4:Heat oil in a kadai (frying pan) and add cumin and cinnamon. Soon after, add garlic and onions.

Step 5: Once the onions turn golden brown add khumbi (mushrooms) and fry for 5 minutes.

Step 6: Add the tomatoes, coriander powder, cumin powder, turmeric powder, and cayenne. Cover and cook for 15 minutes, till the oil separates. (i added the powders first to ensure that the masala is cooked well and only then did i add the tomatoes.)

Step 7: Add the cooked lohbia to the above stir it to mix well and leave it covered for another 15minutes. (the water in which the lohbia was cooked can be added along with this according to the consistency of the final gravy that you require.)

Check for salt n' add more if required and add the chopped cilantro, stir well and let it sit on low heat for another 5 minutes and it's ready. This is best served hot with rice, chappathi or Naan...

It's only recently that i read about the event My Legume Love Affair and i'm sending this post for the 22nd edition of the event hosted by Ruchikacooks.


Also, sending this to the Vegetable Marathon Event- Beans hosted by Anita's Kitchen.

Wednesday, March 31, 2010

Gajar Ka Halwa


I didn’t have anything to do on the last Saturday afternoon (a Sunday afternoon equivalent in the Middle East) and decided to make something sweet. This dish is so easy to make, plus I had some Khoya left over from making Phirni and wanted to finish it. I still have some more left over and will have to hunt down recipes to use them. If you have some recipes using khoya, please do let me know, i would love to try them. :)

I came across the recipe to make Loki (Gourd) halwa as part of a shahi cooking show. Forget making RJ eat it even I don’t like Loki, so I decided I’ll just be a plain jane n’ try Gajar Ka Halwa. I used the recipe from my Nita Mehta's cookbook. Honestly, this one caught me by surprise. I didn’t think it would taste this nice, maybe it was coz of how fresh the carrots were. Anyways, do try it…

Ingredients:

1. Carrot: ½ kg (shredded)
2. Milk: 1 cup
3. Sugar: ¼ cup (I used brown sugar instead n’ hence had used ½ cup)
4. Ghee: 2tbsp
5. Almonds: 5-6 (shredded)
6. Raisins: 10 (I didn’t add them)
7. Cardamom: 3-4 (powdered)
8. Khoya: 100gms (grated)

Method:

Step 1: Boil one cup milk in a clean kadai/wok.

Step 2: Add grated carrots and cook uncovered, stirring occasionally, till milk dries.

Step 3: Add the almonds and raisins. Stir for a minute or so.

Step 4: Add sugar. Cook till the mixture turns dry again. (I didn’t dry it completely as I thought it might be nice to leave it a little wet n’ gooey)

Step 5: Add ghee and stir it for another 10minutes on low flame.

Step 6: Add the grated khoya and mix well.

This can be served hot or cold.

I'm sending this for the event Left Over Delicacies hosted by Daisy Blue of Spicy Lounge as i have used the left over khoya from making Phirni...:)

Monday, March 29, 2010

Rogan Josh

I have never cooked mutton in my kitchen before n’ in all honesty can’t even say I have eaten mutton. RJ eats it, but very rarely. We had been to a barbecue last weekend, our first time by the beach n’ RJ n’ Jeff did some novice fishing too, RJ caught his first fish (one of the smallest I have seen getting caught fishing) but we thoroughly enjoyed the night. In retrospect I’m thinking I should’ve taken more snaps of the food served that day, but I haven’t taken many snaps. We barbecued prawns, tofu (for me, didn’t get paneer), mutton n’ chicken n’ for the sides had a sour cream potato salad, couscous salad and some bread. It was a feast considering we were by the beach. Thankfully it was not windy or hot, the temperature was just right.

As usual I’m digressing, what I wanted to say was RJ just loved the mutton chops that were barbecued that night n’ this weekend when we were doing our shopping, I told him maybe one of these days I should try making something with mutton too. He enthusiastically told me to buy some mutton n’ try something the same day, I was thrilled to the say the least. So I got a packet (this was the least complicated I thought, as I know next to nothing about how to buy mutton) of fresh Pakistani Mutton Chops (I had to remove the fat before cooking).

You know what I found most surprising when I was cooking the meat? The distinct aroma, for some reason I have always associated a raw n’ strong smell to mutton, but that wasn’t the case at all, I actually enjoyed the smell n’ RJ finishing off four pieces in one go....that made me feel great. :) That is also one reason why the snap looks the way it does, I forgot to take snaps once I finished cooking, it was already so late. :( I literally had to make RJ wait before his second helping to get this shot. Another recipe I followed from Nita Mehta’s book…so here you go…

Ingredients:

1. Mutton: 500 gms (you needn’t use chops)
2. Ghee/ Oil: 7 tbsp (this is what the recipe calls for but I used only half of this)
3. Cloves: 3nos
4. Cinnamon Stick: 1 inch piece
5. Black Cardamom: 2nos
6. Bay Leaf: 2nos
7. Asafoetida (hing): ½ tsp (dissolved in 1tsp water)
8. Fennel Seeds: 1 ½ tsp (powdered)
9. Dry ginger powder: ½ tsp (I didn’t have any so didn’t use this)
10. Ginger Paste: 1tsp
11. Onions: 4nos (ground to paste)- I never grind onion in a mixer, I never like the taste when I do this. So instead I finely chop the onions and fry them well.
12. Red Chili Powder: 1 ¾ tsp ( I used Kashmiri Chili powder considering the dish is a Kashmiri specialty)
13. Salt: as per taste or 1 ½ tsp
14. Black Pepper Powder: ½ tsp
15. Green Cardamom: 7nos (powdered)
16. Yogurt: ¾ cup (the recipe says ‘optional’, but I did use it) beat well till smooth.
17. Water: as required
18. Saffron: dissolved in water (I didn’t use this)

Method:

Step 1: Heat ghee/oil in a cooker. Add cloves, cinnamon, black cardamom and bay leaf. Fry for 1-2 minutes.

Step 2: Add the mutton pieces and hing water. Fry for 15-20mins till well fried. The mutton should become brownish in colour.

Step 3: Heat a little oil in another kadai and add the chopped onions and fry till lightly brown and add fennel powder, dry ginger powder, ginger paste, red chili powder, salt and pepper and sauté for a minute more. Allow the masala to cook.

Step 4: Add the above to the mutton in the cooker. Stir for a minute or 2 and reduce heat and add powdered cardamom and curd. Keep stirring till it boils.

Step 5: Add ½ cup water. (the book calls for only half a cup of water but if you want the dish to have more gravy, I think you should add at least 1cup) Close the cooker and allow it to give 2 whistles. By now the mutton should have become tender.

Step 6: Open the cooker once the pressure drops. Keep on low heat for another 10minutes (especially if you think there is more gravy than you need). Add saffron and simmer for another 2-3minutes and serve hot.

Sunday, March 28, 2010

Phirni


I have never been a big fan of Phirni...but RJ just loves it. On the first night in Bhopal during this vacation, we had gone to Jahan Numa Palace in the night to have some treats from their cafe....this is one place i have to go every time we go to Bhopal. We ordered for Phirni as our dessert n' it was the best i have ever had. You know how it is served in matkas (earthen jugs/pots), it's just so Indian...n' when i came across this recipe last week i just had to give it a try. But i didn't have any matkas with me n' had to use my ramekins instead. The ingredients are a little more complex than i normally use, but i preferred this recipe to the condensed milk recipes available online.

Ingredients

1. Milk: 500ml
2. Rice: 1/2 cup
3. Khoya: 1/2cup
4. Sugar: 1 1/2cup
5. Milk: 1 ltr
6. Almond: 1/2cup (crushed)
7. Cardamom Powder: 1/2tsp
8. Kewra: few drops

Method

Step 1: Soak rice in 500ml milk

Step 2: Boil milk adding sugar.

Step 3: Grind the soaked rice and milk (rough grind not in a paste form)

Step 4: Once the milk is boiled, ground rice n' milk mixture to this n' let it cook for a while.

Step 5: Before it thickens too much, add khoya and cardamom powder into this and let it cook for a while. (thicken it)

Step 6: Add chopped almonds and kewra essence.

Step 7: Serve it directly into matkas or into individual serving bowls & refrigerate before serving.

Getting the correct consistency is important. I think i should have thickened it a little more than what you can see here. But the taste was rewarding, so i was happy.

This is my first photo that has gotten accepted on a food porn website..FoodGawker, look here . I'm thrilled to say the least. Thank you FG...;D

Finally...this image is accepted at TasteSpotting too....Oh Bliss!!!

Saturday, March 27, 2010

Chicken Bharta


Honestly, I wasn't sure about the snap i'm putting up. But the recipe is good and turns out really well. So i couldn't resist putting it up. I was so late for work, there was just no time for my average effort at creativity. Maybe the next time i make this dish, i'll have some more time for a better snap...:)

So coming back to the recipe, i feel like i'm rediscovering 'Nita Mehta' all over again, i mean i have had her cook book with me for over 5yrs n' have taken it out rarely. So anyways, thats my mistake, now that i have taken it out, i'm finding such really nice recipes in there. I had separated the boneless pieces when i was making my Chicken Karahi and used those pieces to make this dish. So here you go...

Ingredients:

1. Chicken (boneless): 500gms (cubed)
2. Onions: 3 nos (chopped)
3. Saboot Dhania (coriander seeds): 1 ½ tbsp
4. Dry Red Chili: 2nos
5. Ginger: 1 ½ inch piece (chopped)
6. Garlic: 10 flakes (chopped)
7. Tomatoes: 3nos (chopped)
8. Tomato: 1no (puree in a mixer)
9. Garam Masala: 1tsp
10. Coriander Powder: 1tsp
11. Amchoor: ½ tsp
12. Green Chilies: 2nos (whole)
13. Coriander: 2tbsp (chopped)
14. Kasthuri Methi: 2tbsp
15. Oil: 5tbsp
16. Salt: to taste

Method:

Step 1: Put coriander seeds and red chilies on a tawa. Keep on fire and roast lightly till it just starts to change color. Do not make it too brown.

Step2: Crush the coriander seeds to split the seeds. Break the red chilies with hands into small bits. Keep aside.

Step3: Heat oil in a wok and add chopped onions, cook it till golden brown.

Step 4: Add crushed coriander seeds, ginger and garlic. Stir for a minute or so.

Step 5: Add chicken and stir fry for 4-5minutes on medium heat.

Step 6: Add chopped, pureed tomatoes and red chilies to the above and cook for another 4-5mins.

Step 7: Add salt, garam masala, dhania powder and amchoor. Mix well. Cover and cook on low heat for 6-8minutes.

Step 8: Lower the heat, stir, add whole green chilies, coriander leaves and kasthuri methi leaves. Cook for another 4-5minutes or till done and serve hot.

Tuesday, March 23, 2010

Darbar Ki Karahi


Ok...i know i had declared my previous chicken curry recipe to be the easiest ever. But trust me this is equally easy...and what i loved the most about this recipe is that (apart from the fancy Indian name that is) the texture of the gravy...it looks like it's straight from an authentic Indian restaurant. Karahi Chicken is simply put chicken cooked with tomatoes and cilantro. Honestly, one of the best chicken recipes i have ever tried, my sister has already made it thrice...well the recipe sounds so simple you have to try it...:)..so here you go....


Ingredients:

1. Chicken: 500gms
2. Tomato: 500gms
3. Onion: 1no (sliced)
4. Kasturi Methi Leaves: 1 tbsp
5. Ginger Garlic Paste: 1tbsp (preferably fresh)
6. Turmeric Powder: 1/2 tsp
7. Chili Powder: 2tsp (i used kashmiri chili powder)
8. Salt: as per taste or 1tsp
9. Green Chilies: 5nos (3 whole and 2 slipt in the middle)
10.Coriander Leaves/Cilantro: 1bunch
11.All spice Powder: 1/2 tsp (i used garam masala)
12.Lemon: as per taste
13.Oil: 1/2 cup
14. Water: 1/2 cup (use more according to how much gravy you want)
14.Ginger: cut into thin strips for garnishing (optional)

Method:

Step 1: Deep fry chicken until it cooks a little. Roughly 10-12mins.

Step2: Fry onions till brown, add methi leaves (on law flame) add turmeric powder, chili powder, salt, ginger garlic paste. Allow the masala to cook well.

Step 3: Add the chopped tomatoes (add just a little water if required)

Step 4: Add the chicken pieces to the above. Add water and cook for 15 minutes covered.

Step 5: By now you should get a nice rich gravy.Add the green chilies, coriander leaves & all spice powder/garam masala. Stir well, leave it on the flame for another minute or 2 and its ready.

Squeeze the lemon juice over the curry just before serving otherwise it will spoil the taste. :) Best served with Ghee Rice, Pilaf or any Roti or Chapathi...

Monday, March 8, 2010

Punjabi Paneer Makhani


I was going to make Chicken Kadai, but the lady who comes to help me with cooking n’ cleaning (she comes 3 days a week) was coming today n’ she doesn’t touch non-veg (at all) so I thought might as well make something I can take her help on. I wish I hadn’t asked for her help, I asked her to make tomato puree in the mixer grinder n’ a portion of my kitchen was splattered with tomato puree, she had stuffed too much into the small jar n’ hadn’t closed the lid properly before turning it on. :( So anyway we had a lot of cleaning work along with cooking in the 90mins she comes to work….so I got busy with cooking n’ she got into cleaning. I like finishing my cooking for the day in the morning before I go off to work that way when I reach home I don’t have a mountain of work waiting for me.

The first recipe book I ever bought was Nita Mehta’s Indian cooking. The reason I got it was to learn some north Indian cooking for my husband….i have never tried this recipe before n’ it’s shame that I hadn’t tried it before….there is something so alluring about a simple recipe. I guess after all that struggle (in my case just mental) today morning when a dish comes out well, that’s rewarding enough. I have deviated from the original recipe a little, but I have clearly mentioned them so you can avoid those steps if you feel like it. Do try this recipe…its really nice.

Ingredients:

1. Paneer- 250 gms ( cut into cubes)
2. Tomato- 500gms (I used only 3medium ones) or (if you are using ready made tomato puree I guess ¾ or 1 cup will do)
3. Cashew- 3 tbsp (coarsely crushed)
4. Jeera- 1tsp
5. Ginger Garlic Paste- 2tsp (preferably fresh)
6. Ghee/ Oil- 2tbsp (I used a non stick pan n’ used only 2tsp)
7. Kasturi Methi leaves- 1tbsp
8. Tomato Ketchup- 1tsp
9. Kashmiri Chili powder- ½tsp (reduce the amount if you are using ordinary chili powder)
10. Coriander Powder- 2tsp
11. Garam Masala- ½tsp
12. Milk- 1 ½cup
13. Cream- ½cup (optional)
14. Salt- 1tsp or according to your taste
15. Water- as required
16. Oil- 3tbsp (to lightly fry the paneer cubes, again this step to fry paneer is not there in the original recipe, I thought I’d like it better if its ever so lightly fried)
17. Green Chili- 2nos (finely sliced) the original recipe does not ask for this, but I was scared the sweetness of the dish won’t suit us, so you can skip this if you want.
18. Sugar- as required or ¼ spoon (this is not there in the original recipe either)

Method:

Step 1: Soak the cashew pieces in hot water (half a cup) for 10-15mins. Adding a little water (2-3tbsp) grind the cashew into a thick paste. Keep it aside.

Step 2: If you are making Tomato puree at home, cut each tomato into 4 and boil it for 5mins in half a cup of water. Keep it aside to cool. Make a thick paste in the grinder.

Step 3: Fry the paneer cubes in oil and keep it aside.

Step 4: In a pan heat Ghee and add jeera to it. Once jeera turns brown add the ginger garlic paste to this and fry it till the color changes.

Step 5: Add the tomato puree to this and fry it. (till the mix becomes dry and dark in color n oil starts oozing out) I added my chopped green chili and fried it along with the puree.

Step 6: Add kasturi methi and tomato sauce to this. (on low fire)

Step 7: Add coriander powder, chili powder, garam masala, and salt. Since I had reduced the amount of ghee to 2 tsp I had to add some water at this stage as the mixture was really dry. Stir it till the masala is cooked well.

Step 8: Add the cashew paste to this n’ mix well. Taste it to see if its too sour n’ add a little sugar to balance the taste.

Step 9: Heat the milk to be added (just 1 min in the microwave will do) and pour the warm milk into the above. Stir well. The original recipe asked us to keep the gravy aside to cool n’ then add the milk. But I figured adding hot milk to the hot gravy will do the trick as I was running out of time.

Step 10: At this point the gravy will look really rich n’ thick n’ smell nice. Add the paneer pieces to this gravy stir it for another 4-5mins. The curry is ready.

Step 11: If you are adding cream, do so at this stage and stir lightly (more like folding). And take off the fire immediately. Add a dash of cream on top before serving.

I'm posting this recipe before my husband eats it for lunch today, normally i will wait for his verdict. But i'm sure he will love this with chapathi..:) I think this will be best served with Chapathi or Tandoori Roti or Jeera Rice...

Monday, March 1, 2010

Chicken Masala


This chicken curry is something I can make in my sleep…i have made it so often…i don’t even know how I started making it in the first place….its a combination of a recipe from my mom n’ some other recipe I saw somewhere…either ways…its on my quick fix list…if I ‘m feeling really lazy or I’m short of time…but I want to make an impression….then I make peas pilaf and this curry n’ my husband is a happy man….he really likes it…so here you go

Ingredients:

1. Chicken- 900gms (medium to small pieces)
2. Onion- 2nos (medium- chopped)
3. Ginger Garlic Paste- 1tsp (preferably fresh)
4. Tomato- 1no (chopped)
5. Green Chili- 1no- Slit into 2 (optional)
6. Chili Powder- 1tsp (use kashmiri chili powder if u don’t like spicy food)
7. Turmeric Powder- ½ tsp
8. Coriander Powder- 1 tsp
9. Garam Masala- ½ tsp
10. Cumin Powder- ½ tsp
11. Bay leaf- a small piece
12. Cinnamon- a small piece
13. Jeera- ½ tsp
14. Cardamom- 4nos
15. Cloves- 2-3nos
16. Black Pepper- 1tsp (coarsely crushed)- less if you don’t want it to be spicy
17. Salt- 1tsp or as required
18. Oil- 4tbsp (I use only 2 most of the time)

Method:

Step 1: Pressure cook the chicken pieces adding salt and crushed black pepper. No need to add any water. One whistle is enough.

Step 2: In a wok, heat the oil n’ add Bay leaf, Cinnamon, Cardamon, Jeera and Cloves.

Step 3: Add chopped onion and fresh ginger garlic paste to this. Sauté it until the onion turn golden brown.

Step 4: Add chili powder, turmeric powder, coriander powder, garam masala, Cumin Powder to this. Add a little water if the mixture seems too dry. Allow the masala to cook well and oil to separate.

Step 5: Add chopped tomatoes to this. Allow it to cook for a 4-5mins n’ then mash it with a potato masher (if u don’t have this, as round bottom spoon should do). You can add ready tomato puree (½ cup) instead. Allow it to cook well and oil to separate from the gravy.
Step 6: The chicken will have a small amount of liquid/stock inside the pressure cooker. Add this to the above gravy and mix well. Add the slit green chilies if you are using them at this stage.

Step 7: Add the chicken piece to this gravy n’ cover it n’ cook it for another 5-10 mins. You can add coriander leaves for garnishing before serving.

I think its best served with any rice dishs or chapathis (might be a little too dry for chapathi). When I’m serving this with chapathi I will try n’ increase the level of water slightly in step 4.

Sunday, February 28, 2010

Paneer Tikka Masala


I have been making paneer at home mostly….but I have this problem that they don’t form a shape for me to cut them into cubes….once I hang them for the water to drain….i don’t know what to do to get them into a square or rectangular shape for me to cut them into cubes later….the day I learn how to do this…I’m gonna share it with the world…so mostly I have been making paneer burji or paneer cutlets or paneer wraps…(will post these recipes once I take some snaps)…the problem is I make all this once I get back from work….n’ my husband is no help in the kitchen….so by the time I’m done making things (I’m kind of slow)…I’m way too tired n’ hungry to get more creativity out of me for a good snap…needless to say he will be really hungry too…that’s how I have been so quite on my blog…..me doing this blog and the so many wonderful food blogs out there has kind of inspired me to cook new things…but the more interest I take in cooking….the more weight I put on…what with just the 2 of us to finish whatever I make….so I’m taking this food blog thing a little slow.

Anyways….so I’m on a veggie food spree and decided to buy paneer this time so that I can try some north Indian recipes……what I could mostly find on the web were panner butter masala…2 good recipes are available here

http://www.mariasmenu.com/vegetarian/paneer-butter-masala

http://mykitchenantics.blogspot.com/2009/07/paneer-butter-masala.html

I almost went ahead n’ tried this. But then I came across a simple Panner Tikka Masala on a cooking show on the TV and decided to try it instead…so here you go….

Ingredients:

For the Marinade:
1. Yogurt- 2tbsp (the host asked us to use thick yogurt if u don’t have that…then hang the yogurt in a muslin cloth to reduce the excess water)
2. Chili Powder- ½ tsp (more or less according to taste…this is less according to me)
3. Kastoori Methi Powder- 1tsp
4. Salt- as per taste
5. Lime Juice- Half a lime
6. Oil- 1tsp
7. Paneer- 400gms (sliced into cubes)
8. Tomato- 1 (deseeded n’ sliced into cubes)
9. Capsicum- 1 (sliced into cubes)
10. Onion- 1 (sliced into cubes)

For the rest;)
1. Oil- 2-3tbsp
2. Jeera Seeds- ½ tsp
3. Onion- 1 big (Chopped)
4. Ginger Garlic Paste- 1tsp (preferably fresh)
5. Turmeric Powder- ½ tsp
6. Coriander Powder- 1tsp
7. Cumin Powder- ½ tsp
8. Chili Powder- ½ tsp
9. All purpose flour (maida) – 1tsp
10. Tomato Puree- 1 cup
11. Fresh Coriander Leaves- 1stem (chopped)
12. Garam Masala Powder- 1tsp
13. Water- as required
14. Salt: as per taste
15. Cream : 2-3tbsp

Method:

Step 1: Add yogurt, kastoori methi, lime juice, chili powder, oil and salt (from the ingredients for the marinade) into a fine paste. Add Paneer, tomato, onion n’ capsicum cubes to this paste n’ marinate for atleast half an hour.

Step 2: Heat oil in a pan and add jeera, once the jeera splutters, add the chopped onions and ginger garlic paste to this. Let it cook until the onion turns golden brown.

Step 3: Add turmeric, coriander, cumin n’ chili powders to the onion. Let the masala cook for a while. Add the flour to this n’ let it cook for a while. (don’t move on to the next step till the flour is cooked well…you will be able to see the oil separating from the mix and that’s an easy way to know its cooked)

Step 4: Add salt and the pureed tomatoes to this…stirring it occasionally let this mixture cook for a while. Depending on the whether you are using canned tomato puree or fresh the cooking time will vary a little. If you are using canned tomato puree it will cook faster. Once the oil starts to separate add a little water to get a thick gravy (if required)…

Step 5: While the tomato puree is being cooked, grill the marinated paneer and veggies on a grill pan or in the oven, I used my grill pan this time but decided to try the grill in the oven the next time around….the only reason why I’m thinking this is as more oil is required when u grill them in a pan compared to grilling them in the oven (I think so I’m not too sure)….the tomato cubes tend to get cooked faster than the other cubes….so take them off the grill sooner than the others. (If you are using skewers in the oven I guess this shouldn’t matter.)

Step 6: Add the grilled paneer and veggies to the gravy n’ let it cook for a atleast 10 mins….add the garam masala powder on top of the curry n’ mix well….let it be covered for 5more mins. Add the cream one spoon at a time n’ mixing it with the gravy….let it cook for another 5mins n’ add coriander leaves to this to garnish.

Its best served with plain rice, tandoori roti or chapatti……I added on sliced green chili along with the garam masala as I wanted the dish to be a little more spicier….also its possible that the gravy turns a little too sour…again it depends on ur tomato puree….if this happens…just add 2-3pinches of sugar n’ that should resolve your problem…. I’m not too fond of adding red color to my food….but I guess most of the restaurants add color to enhance the look….do so for this recipe if you want….might make it look exactly like what you buy from restaurants...:)

Tuesday, July 28, 2009

Rajma - Red Kidney Bean - Indian Curry

This is one dish i can make n' make it well even in my sleep. I have made this a countless number of times as my husband loves it. Infact i made this for him even before we got married n' i'm sure one of the major reason for us being married today is my rajma curry....;)

So here we go.....
Ingredients

Rajma: 1 1/2cups (soaked overnight or at least for 6-7hrs)
Water: 6-7 cups (at least)
Onion: 2 nos (medium)- (finely Chopped)
Ginger Garlic Paste: 1 1/2tsp (preferably fresh) (if u are using ready made i guess 1 tsp will do)
Tomato- 1-2nos (Chopped)- puree it if you like... might taste better...
Cream/ Curd: 1 tbsp (optional)
Salt- as per taste
Oil: 3-4tbsp (the recipe book i had consulted 4yrs ago said some 6tbsp)
Coriander/Cilantro Leaves & Green Chili: for garnishing
MASALA POWDER
Chili Powder: 3/4tsp
Turmeric Powder: 1/4tsp
Coriander Powder: 2 tsp
Garam Masala: 1tsp
Amchoor: 1/4tsp (optional) but adding it brings a great flavour
FRESH GARAM MASALA
Black Pepper Corns: 4-5nos
Cardamom: 2nos
Bay Leaf: a small piece
Cinnamon: 1 small piece
Cumin Seeds: 1/2 tsp

Method

Step 1: Pressure cook the soaked rajma for 30mins on low fire. I cook it with salt as i think it tastes better this way.

Step 2: Grind fresh garam masala (preferably by hand in a mortar and pestle). Add oil into a hot wok and add this ground garam masala once the oil is hot.

Step 3: Add chopped onion and the ginger garlic paste. Fry it well so that the raw taste won't remain.

Step 4: Add all the masala powder to this. Add a little water from the water in the cooked rajma. If you are cooking the rajma and making this gravy at the same time then this won't be possible, if so then add just a little plain water. Cook it till oil separates.

Step 5: Add chopped/ puree tomatoes. Fry it till its really soft and squash the pieces if any with a spoon.

Step 6: If you are adding cream or curd...add it now. The color of the gravy will turn a light brown at this point. Stir it for a min or so n' it will turn back into the dark brown color.

Step 7: I add some cooked rajma to this gravy at this point n' mash it up together to get a thick paste. Ok...this step can be avoided too...but somehow i like doing this. ;)

Step 8: Add only the beans to the gravy and cook for a while, stirring to get the flavour on the rajma. Add the extra water from the cooker and leave it covered for 10mins of so. Add enough water to form a thick gravy (keeping in mind that it will thicken once it cools).
This is ready to serve with some garnish. It tastes really good with Indian Chapatti and plain rice and i almost always serve it with an easy cucumber salad. My husband is does not eat most of the veggies everyone likes (if cooked), but if given as a salad (those that can be used for a salad) he will finish the whole thing without any problems. ;) I also use the same ingredients and follow the same steps to make Lobia (Black Eyed Peas- Indian Curry).

Related Posts with Thumbnails