Pages

Showing posts with label Spicy. Show all posts

Monday, July 4, 2011

Kerala Mango Pickle or Curry/ Kadumanga Achar


Photobucket

Photobucket


This is my third post on Mangoes this month, I had gotten distracted with my baking mission n' couldn't complete the hattrick as planned. :) This pickle, even though it comes under the category of a pickle is often mistaken n' eaten as a Mango Curry. Kanji, the most popular comfort food of a Malayali, is most often accompanied by this pickle. I love it so much, this is one of the first things I wanted to make the moment I got a kitchen to myself. The only thing is, I love eating it even without anything with it. I can just eat this in a bowl n' be happy about it. I have consciously stopped doing this, but the inane desire is to do just that, the moment I see this pickle is still there.

I can eat pickle with anything n' everything, that's how much I love it. But other than this, I don't make any other pickle at home. The white lime pickle, the no oil red lime pickle, the black gooseberry pickle, the mango with mustard seeds pickle etc that we keep a stock of at home are all supplied by my mom. This pickle has less shelf life than the other pickles. The recipe? Here you go. :)


Photobucket


Ingredients:

1. Raw Mango: 2nos medium (chopped or rather cubed into really small pieces)
2. Chilly powder : 2 tbsp (or as per taste)
3. Turmeric powder : 1/2 tsp
4. Salt : As reqd
5. Gingelly oil : 5tbsp (best for pickles)
6. Fenugreek(Uluva) powder : 1 tsp
7. Asafoetida(Kaayam) powder : 1/2 tsp
8. Vinegar : 3tbsp ( or more depending on the taste)
9. Curry leaves : 1 bunch
10. Mustard seeds : 1 tsp
11. Dry Red Chili: 1-2nos

Method:

Step 1: Add salt to the mango piece n' keep it aside for atleast an hour or 2.

Step 2: In a kadai/wok, heat the oil. Add mustard seeds, fenugreek seeds, dry red chilies n' curry leave. Allow it to splutter.

Step 3: Remove the kadai from the stove and add the red chili powder, turmeric powder n' asafoetida powder. (You are doing it off the stove cause we need to take care not to burn the powders used.)

Step 4: Mix in the mangoes into the above mixture. Allow it to coat well. Add vinegar. Check the salt n' add more if required. Keep it aside overnight or at least for 4-5hrs to allow it to absorb the spices.

If you ask me, its best served with everything. ;) But traditionally, its served with Kanji or Rice n' Curry. Happy Cooking!!! :)


Photobucket

Photobucket

Sunday, July 3, 2011

Mushroom Pepper Fry


Photobucket


Photobucket


I love mushrooms in all forms. Some of the other mushroom recipes on my blog are, Black Eyed Peas with Mushrooms, Mushroom Ragout on Garlic Toast. There are very few things that Rj eats without any qualms, which aren't under the category of Non Veg food. Mushrooms happen to be one of them. So i'm always on the look out for an interesting way to cook them. This recipe is spicy n' really hits you with its flavours n' we love having it with a simple daal n' chapathi or rice. I have added cubed capsicum to balance the spice and its a winner. So here you go...


Photobucket


Ingredients :

1. Mushroom : 200 gms (each sliced into 4 pieces)
2. Onion : 1 no
3. Green chilies :2 nos. (slit)
4. Bell Peppers (Capsicum) : 1/2 cup (chopped)
5. Garlic: 1-2nos (crushed)
6. Curry Leaves: as much as you like (the more the better)
7. Pepper Powder - 3 tbsp (use freshly crushed for best results)
8. Oil - 2 tsp
9. Mustard seeds
10. Salt to taste

Method:

Step 1: Heat oil in a wok , add mustard seeds n' curry leaves to do a tadka.

Step 2: Add chopped onions n' garlic and saute till onion turns translucent.

Step 3: Add green chillies and mushrooms. Sprinkle salt on the mushrooms n' allow it to ooze out the water. On high flame allow the water to evaporate while stirring the mushrooms occasionally.

Step 4: Then reduce the flame to sim , add the pepper powder, stir it in n' allow it to cook well. Add the cubed/chopped bell peppers at this stage. (they cook quickly, n' hence I prefer to keep it crunchy i'm adding it at this stage. If you want them well cooked add them along with the mushrooms in step 3.)

Its best served with Daal, Rice or Chapathi. :)...Happy Cooking!


Photobucket


Photobucket


Saturday, May 28, 2011

Chettinad Chicken


Photobucket


I'm a big fan of chettinad cuisine, just the thought of the Beef Chettinad that I had in Goa, during our vacation in Decemeber, still makes my mouth water. But I haven't tried a lot of chettinad cuisine at home, other than this Egg Chettinad I had made long back. Rj had to go out of station on a family emergency n wanted to make something nice for him for dinner the day before he left.

Photobucket


In a situation like this, I find it easy to rely on cooking expert Sanjeev Kapoor's recipes. I have complete faith in his recipes, like I always say they will never let you down, even if you are trying it for the first time! That's how I decided on  Sanjeev Kapoor's Chicken Chettinad recipe. I have followed his instructions to the last dot n' it was amazing. I have always favoured my Darbar Ki Karahi and Murgh Makhani recipe for chicken if I want to make chicken it for a special occasion, but I have to say, this recipe is gonna be a stiff competition to all my previous chicken recipes. So here you go...

Photobucket


Ingredients:

1. Chicken : 500gms/ half a kilo
2. Dry Red Chilies: 5 whole pods
3. Coconut: 1/2 (scraped)
4. Poppy seeds (khuskhus): 1 tsp
5. Coriander seeds: 1/2 tsp
6. Cumin seeds: 1/4 tsp
7. Green cardamom: 1no
8. Clove: 1no
9. Cinnamon: 1/2 an inch piece
10. Star anise: 1/2
11. Fennel seeds (saunf): 1/2 tsp
12. Ginger: 1 inch piece  (roughly chopped)
13. Garlic: 5-6cloves
14. Oil: 1/4 cup (the original recipe used olive oil, but I used regular sunflower oil)
15. Onion : 1no (medium) chopped
16. Curry leaves: 10-12
17. Tomato: 2 small or 1 large (chopped)
18. Red chili powder: 1/2 tsp
19. Turmeric powder: 1/4 tsp
20. Lemon juice: as per taste
21. Coriander leaves: 1tsp (chopped)
22. Salt: as per taste

Method:

Step 1: Roast dry red chillies, coconut, poppy seeds, coriander seeds, cumin seeds, green cardamom, cloves, cinnamon, star anise, fennel seeds in 1 tbsp of oil

Step 2: Grind the above into a paste along with ginger and garlic. (my mallu instinct worked overtime n' i tried using my new stone pestle n' mortar unsuccessfully to do this, so I had to do a little twist later, which I will mention)

Step 3: Heat the remaining oil in a kadai/wok and fry onion till golden. Add curry leaves and the ground paste and sauté for some time.

Step 4: Add tomatoes, red chilli powder, turmeric powder and salt to taste. (at this stage I could see that my paste needs to be a little more ground n ground the same in a mixer grinder to a fine paste. That is the reason why you can't see any tomato pieces or curry leaves in my pictures) Once I ground the same into a thick paste, I sauteed them for a min more in the same kadai without adding more oil.

Step 5: Add chicken and mix. Cook for five minutes and then add two cups of water, lemon juice, cover and cook till the chicken is done.

Step 6: Serve hot garnished with coriander leaves.

Photobucket


It is best served with hot rice or chapathi or even paratha. But I served it with puttu, coz after taking time out to decide on what to make n' the whole process above I had time only for something simple like puttu. :) Happy Cooking!!!

Photobucket

Tuesday, May 17, 2011

Pani Puri- Nirvana at Home

Photobucket


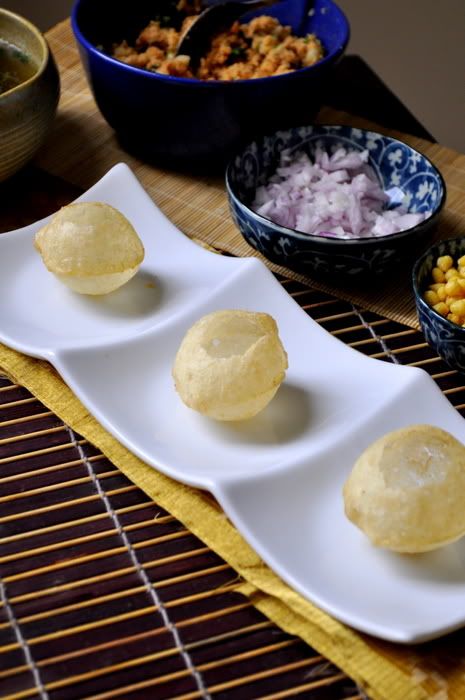
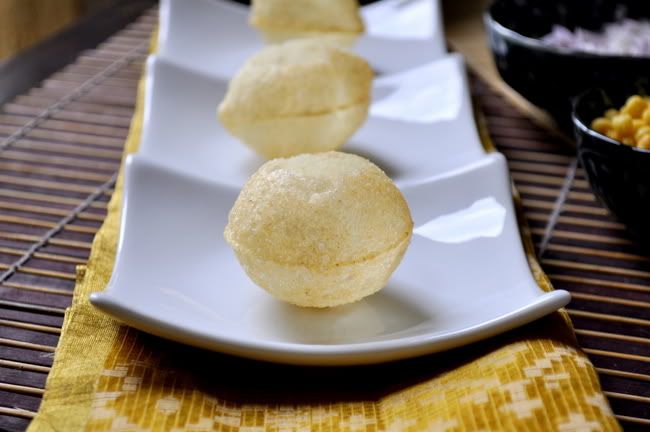
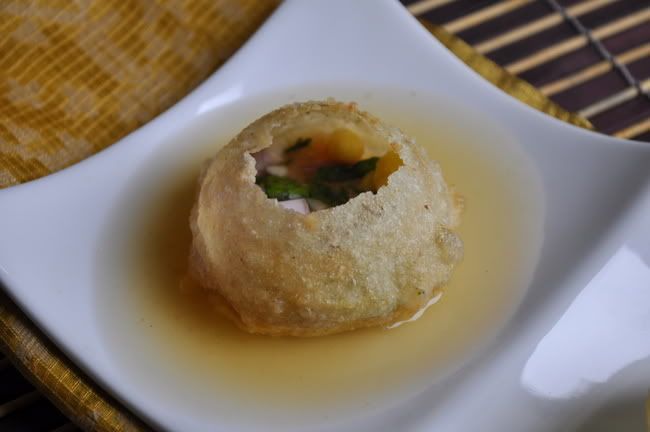
I had gone missing from blogsphere for a week simply coz I had a home full of loved ones n' was happy being busy. My mom n' my sister n' family were here with me for a vacation n' I had a great time with them....the best part about moving back to India is the amount of time I get to spend with my family. Coming back to this post. I can easily call Pani Puri my all time favourite snack....when I say all time, I really mean it....I can have it all the time/ anytime of the day n' relish it. For those who have never had it, Pani Puri is a popular street snack in India. It comprises a round, hollow puri, fried crisp and filled with a mixture of water, tamarind, chili, chaat masala, potato, onion and chickpeas. It is small enough to fit completely in one's mouth. The first time I had them was when I moved to Bangalore for my studies 10yrs back. I couldn't hold the whole puri in my mouth the first time around n' I remember thinking to myself 'how did I live to be 20 without ever tasting this?' I hunt for the best Pani Puri joint everywhere I go. In Bahrain, I had a Biharikaka who made such divine pani puri....n' he wud give me 2 extra sukka puri just to see how happy it made me, I think. ;)
Photobucket


I could have pani puri off the street vendor n' not think too much about it, but gone are those days....i'm more concerned about hygiene of the food n' the environment now. I don't eat pani puri or anything which uses water or fresh fruits n' veggies from a street vendor anymore. My youngest cousin,Indhu, who I love more than I can say, recently got typhoid n' was in really bad state. She was admitted in the hospital for 2weeks n' she has a small baby gal aged just over 1yr...everyone was so so worried about her. But now she is feeling better, the once healthy gal has become less than half her size, with really bad intestinal problems. I'm mentioning this in detail just so I can give out a word of caution to all who likes to eat from the streets. She caught it eating chat n' drinking some masala drink from one of the street vendors in Delhi. I also have to mention that her sis in law who ate/drank from the same place is ok. But really, the moral of the story is just that one needs to be cautious of where and what you are eating.
Photobucket


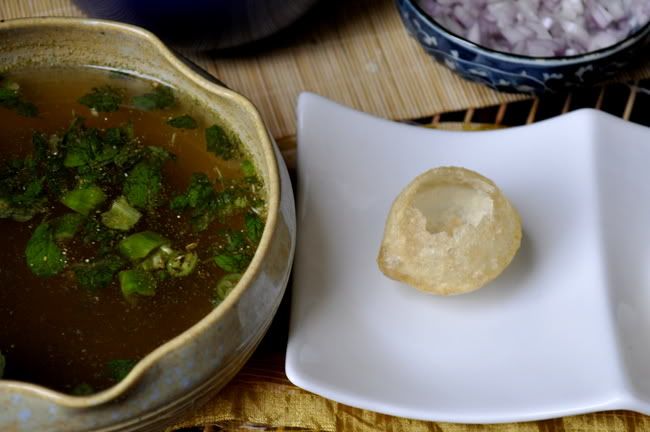
Koshy's Calcutta Chat on Brigade Road dishes out the best chat in town for me, including a good pani puri. But that being a little far off n' me not frequenting Brigade Road anymore meant I have to find a new source...My mom n' my sister loves pani puri too, so I decided to make it for them. My mom found it hilarious that she has to wait for me to finish taking some snaps before they could dig in....lol..;). I used ready to use small puris n' pani puri masala for the water. So here you go.
Photobucket


Ingredients:

1.Puri: 20nos

For the Filling:

2.Potato – 3 nos (medium-sized, boiled with salt, peeled and mashed)
3.Garlic – 2 to 3 pods (finely chopped)
4.Ginger – 1/2″ long piece (crushed/minced)
5.Coriander/Cilantro – 2tbsp (finely chopped)
6.Green Chili (optional) – 1 no (finely chopped)
7.Chili powder – 1 tsp
8.Garam Masala – 1 tsp
9.Cumin Powder – 1 tsp
10.Coriander Powder – 1/4 tsp
11.Amchur Powder/ Dry Mango Powder (optional) – 1/2 tsp
12.Salt – to taste
(add some fresh moong sprouts to get some extra flavour, I didn't have any with me so I didn't add it this time.)

For the Water:*

13. Everest Pani Puri Masala: 2tbsp
14. Lemon Juice: of half a lemon (medium size)
15. Mint Leaves: a palm full (crushed)
16. Salt: as per taste (keeping in mind that the masala already has some salt in it)
17. Green Chilli Paste: 2tsp
18. Tamarind Pulp: 2tsp
19. Dry Mango Powder: a pinch or 2
20. Water: as required (i used roughly 2cups)
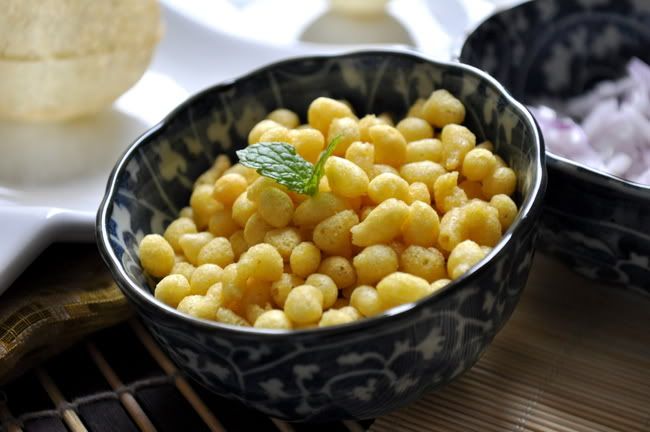
21. Boondi
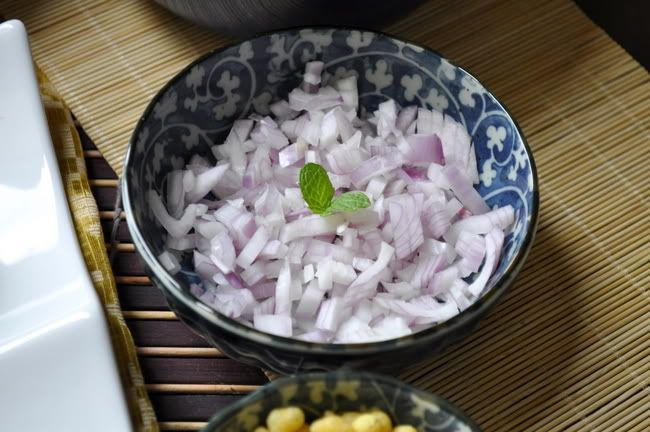
22. Chopped Onion

*all the ingredients mentioned under pani puri water, can be adjusted according to taste. I have mentioned how much I have used, but change it according to your taste.
Photobucket


Method:

Step 1: Mix all the ingredients required for the Pani Puri water n' keep it aside. If you like the water chilled, keep this mixture in the refrigerator at this point. (I don't like mine chilled so I didn't do this). Do not mix the boondi n' chopped onions at this point. You can add that on top while serving.

Step 2: Mash the boiled potatoes n' mix all the ingredients. Keep it aside.

You are actually ready to serve. Even though the list of ingredients seems long, it requires hardly any prep time. Also, if you want to serve it to guests, you can do all the preparation in advance n' make the holes in the puri n' stuff the filling in, dip it in the pani puri water n' there you have it....;) mouthful, eyeful n' wonderful....lol
Photobucket

Sunday, August 9, 2009

Prawns Chili Fry or Prawns Ullarthiyathu


This has to be one of the simplest, easiest n’ tastiest way of eating prawns. But it still doesn’t compare to the best dish of prawns we have ever had. I still remember clearly how we had some prawns chili fry from a shack in the Goan beach during our honey moon….i had never before or since have eaten prawns that tasty…..n’ my mom’s lobster fry, hands down, is the best I have ever had in my life…my father used to buy it just for me (even though it was expensive)….coz I loved it so much….n’ amma used to make it so spicy that I could feel like I’m breathing out n’ taking in fire….:) after eating it…Even my cousins who doesn’t eat as spicy food as us…could never resist my mom’s lobster dish…I don’t know if I will ever be able to make them that well…but for the time being I satisfy myself with this simple prawns preparation. My personal favourite way of eating dish is with some nice hot Sambar n’ white rice. :D

Ingredients:
1. Prawns: 300gms
2. Small Onion (aka Sambar onions): 10-12nos (Sliced)
3. Ginger: ½ tsp (chopped)
4. Garlic: ½ tsp (chopped)
5. Chili Powder: 1tsp (reduce if you don’t want it to be spicy)
6. Turmeric Powder: ½ tsp
7. Coconut : 2tsp (Sliced)
8. Kodam Pulli (Gambogea ): 1-2 pods (soaked in water)
9. Salt: as per taste
10. Oil- 2tbsp (add 3tbsp if you like)
11. Mustard Seeds: 1tsp
12. Curry Leaves: 10-12nos

Method:
Step 1: Wash, clean n’ devein the prawns.

Step 2: Mix the sliced small onions, ginger, garlic, Kodam Pulli along with the water, chili powder, turmeric powder, coconut slices n’ salt with the prawns. Cook this without adding any additional water to this. Prawns cooks really fast, so you can actually make this on high flame, the liquid which oozes out of the prawns will evaporate quickly. (I use a mud vessel that’s commonly used for making fish in Kerala for this. But it’s up to you what dish/pan you want to use to cook these prawns.)

Step 3: To fry the prawns, heat oil, add mustard seeds (wait for it to splutter) n’ add curry leaves n’ once it changes color add the cooked prawns with the thick gravy into this n’ fry it well. Again don’t overcook otherwise the prawns the softer they are the juicier they are. :) Add a pinch or 2 of crushed black pepper before taking it off the fire n’ mix it…adds a wild zing…:D

Wednesday, July 8, 2009

Healthy Maggie Noodles & Chili Mushroom with a Dash of Honey

Yup, i have the nerve to call this Maggie Noodle dish a healthy recipe. ;)... I never use their taste maker and avoid using ajinomoto in my cooking....Also, i just love chinese food or should i say 'the indian version' of the chinese food...:)

Anyways, i do use chinese noodles once in a while or even rice noodles and follow the same recipe. But this time i decided to use this favoured brand. Just before we left india Nestle had launched a Shahi Puloa flavoured Maggie and i used to just love it....i can't find it anywhere in Bahrain. Anyways getting back....i like to make this recipe without beef or chicken strips but i guess one can add it if you want. So here we go...

VEG NOODLES

Ingredients

Noodles : 2 or 3 packets
Water: more than the instructions given
Oil: 1 1/2 tsp
Salt: 1 tsp

Spring Onion: 1 stem
Red Capsicum: 1 (cut long)
Green Capsicum: 1 (cut long)
Onion: 1 (juliened)
Garlic: 2-3nos (chopped)Green Chili- 2nos
Oyster Sauce- 1tsp
Soya Sauce- 1tsp
Schezwan Sauce- 1/2tsp (optional)
Oil
Salt
(Adding Carrots, Beans and Sprouts is optional)

Method
Step 1: Boil water, as soon as it’s boiled, add oil and salt and to this. Add the dry noodles. Turn off the fire and check the noodles to see if its cooked. As soon as its soft strain it and keep it aside. (this will ensure that we don't end up with lumps!)

Step 2: Heat the oil and add the chopped garlic and the spring onion. This is will change the aroma of the oil and will smell really nice.

Step 3: Add the onion and green chili to this.

Step 4: As soon as the onion is cooked, add the red and green capsicum to this (any other veggies or meat pieces if you are using can be added at this stage). You might need to change the proportion of oil according to the amount of extras used.

Step 5: Add all the sauces to this. Ensure it’s not cooked till the veggies soften too much. It's best if it’s still a little crunchy. Add more salt if required, keeping in mind that the noodles already has salt.

Step 6: Add the cooked noodles to this, toss it to mix it well.

Even though it has enough sauces i don't like eating it without any curry ;)...so here's my simple and easy Chili Mushroom...

I have always disliked adding batter (as is a practice in some chinese dishes) to the mushroom before using them and i never do it....

CHILI MUSHROOM

Ingredients
Mushrooms- 2pkts (250 gms each)- chopped
Ginger- 1/2 inch piece (finely chopped)
Garlic- 3nos (finely chopped)
Dry Red Chili- 3-4nos (chopped)
Onion- 1 (chopped)
Soya Sauce- 1 tsp
Oyster Sauce- 1 tsp
Schezwan Sauce- 1/2 tsp
Tomato Ketchup- 1 1/2 tsp (adding this will give good color and helps if the dish has turned out to be too spicy)
Fresh Black Pepper- Ground- 1/2 tsp
Salt- as per taste
Oil or Butter- 1tbsp
Honey- 1 tbsp

Method
Step 1: Heat oil/butter in a wok and add chopped garlic ginger and red chili.

Step 2: Add chopped onion. Fry till lightly brown.

Step 3: Add all the sauces and salt except the tomato ketchup.

Step 4: Add chopped mushrooms. Let it cook a while as the moisture from the mushroom will create a light gravy while it cooks.

Step 5: Let the mushrooms soften and keep tasting to check how spicy it is before adding the pepper powder. Add as required.

Step 6: Add the tomato ketchup to this. By now it should have a thick gravy. Drizzle the honey on top and its ready.

At the end of all this last night i was feeling so good...i mixed up some fresh apricots, fresh cherries, Cream and Chocolate cake and made something...yet to decide what i should call it...;)


Related Posts with Thumbnails