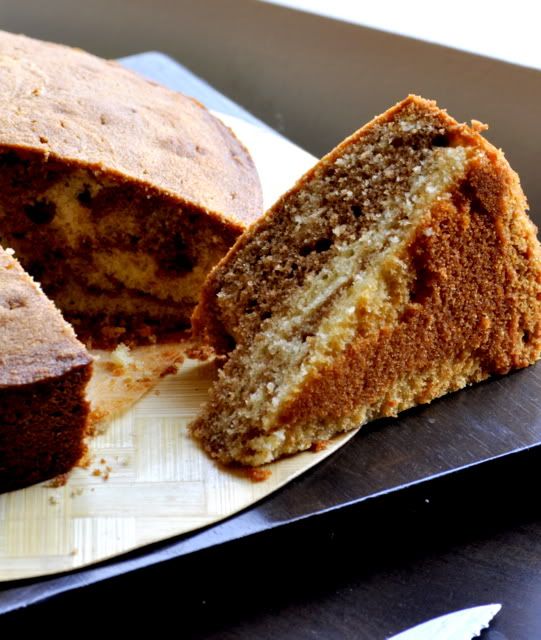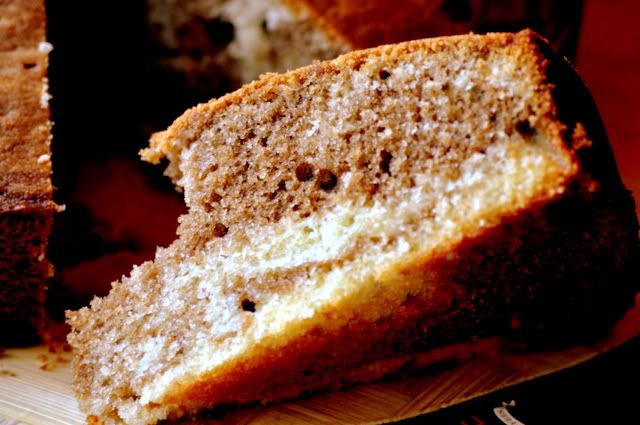
If you look into my blog you can see that i'm a novice at baking. That being said i'm thrilled to bits today coz I baked my first marble cake without using a ready mix....yipppeeee....i'm just so happy....Even though I prefer savoury things to sweet things, I do love a good Marble Cake. My appa used to buy me a marble cake from Anns Bakery ( a famous chain of Bakery from my part of Kerala) as I leave home to come to Bangalore. Honestly, I used to loathe sharing it with anyone. But RJ likes it even more than me, I think. He is cake-aholic of sorts.
These days, I sorta ask him everyday morning..."what would you like to try today?" (makes it sounds very 'oh I can make anything n' everything you want types')...but in reality, i'm really scared of making things I have no clue about. He asked me for a Marble Cake yesterday n' lets just say I didn't make it..But anyways today morning, I decided to give it a go. Feels like I have accomplished something huge....:D...i'm so glad I like my Marble Cake too...i'm just dying for RJ to come home n' get a taste of this....;). So here we go.

Ingredients
1. Butter: 225g (softened)
2. Caster Sugar: 225g
3. Eggs: 4nos
4. Flour : 225g
5. Baking Powder: 1tsp
6. Baking Soda: 1/4tsp
7. Salt: a pinch
8. Milk: 3 tbsp
9. Vanilla extract: 1 tsp
10. Cocoa Powder: 3 tbsp
Method
Step 1: Heat oven to 180°C or 350°F. Grease a 20cm cake tin and line the bottom with a circle of greaseproof paper. ( my Oven becomes hot fast, so as part of saving power, i always do this step just before I mix the dry ingredients with the wet ingredients.)
Step 2: Sift together, the flour, baking poweder, baking soda n' salt. (try n' sift it atleast twice to be sure that baking powder n' soda mixes well or alternativly just use 225 self raising flour)
Step 3: Beat the butter and sugar together, then add the eggs, one at a time, mixing well after each addition.
Step 4: Fold through the flour, milk and vanilla extract into the above until the mixture is smooth. ( I got a little worried at this point, coz the mixture seemed much more thicker n' fluffier than my BC cake mix that I'm used to. But I just blindly trusted the recipe n' went ahead)
Step 5: Divide the mixture between 2 bowls. Stir the cocoa powder into the mixture in one of the bowls. Take 2 spoons and use them to dollop the chocolate and vanilla cake mixes into the tin alternately. ( The only thing I will do differently the next time is reduce the quantity of the mixture which i'm using to mix the cocoa powder that way I think I will get more defined portions once the cake is baked.)
Step 6: When all the mixture has been used up, tap the bottom on your work surface to ensure that there aren't any air bubbles. Take a skewer and swirl it around the mixture in the tin a few times to create a marbled effect.
Step 7: Bake the cake for 45-50 mins or until a skewer inserted into the centre comes out clean. Turn out onto a cooling rack and leave to cool.
This recipe is a keeper. I'm gonna give it ★★★★★ ;)


OMg, wat a gorgeous and spongy marble cake...simply superb..
ReplyDelete@priya....thank you so much...can't tell u how excited i have been the whole day just coz this came out well....;)
ReplyDeleteWoww... looks yummy and delicious..
ReplyDeleteIndian Cuisine
is it ur own recipe..as in did u create it on ur own..if so hats off 2 u..u are def an awesome baker:)
ReplyDeletewith a ready mix itself ive never got the marble cake right so im a bit wary of trying it out :)
like the 1st pic
@Hari...thank you...:)
ReplyDelete@Nish....thank you.....i didn't create the recipe, its from an old book at home in ktym....;) really try this recipe....you can't fail...
Yummy and it came perfect .. looks very tempting !!
ReplyDeleteMiriam, this is killin me! :) The recipe is similar to the one I make...just remembered that I haven't baked a marble cake for myself from a long time. Everytime I bake it, it is to give away to someone :)
ReplyDeletewolla...awesome!!
ReplyDeletelooking at the tender crumb, I can see how well this recipe works.
ReplyDelete